Pressure Profiling and Flow Control Effect On Espresso: The Espresso Guide Backed by Science
Quick answer
Pressure profiling means changing the water pressure during a shot.Flow profiling means changing the water flow rate. They are two ways of steering the same thing, because pressure equals flow multiplied by how much the coffee puck resists it. Both let you do something a flat 9-bar machine cannot: gently soak the puck, hold extraction steady as the puck weakens, and tame channeling. The science says profiling is a real, useful tool, with its biggest payoff on light roasts, consistency, and reducing waste. But it sits down stream of brew ratio, grind, dose, and puck prep. Get those right first, then profiling becomes the fine-tuning that takes a good shot to a great one.
That is the whole article in a paragraph. If you want the reasoning, the peer-reviewed numbers, the machines that make it possible, and copy-paste recipes to start tonight, keep reading.
What is pressure profiling?
Pressure profiling is the practice of deliberately varying water pressure across the different stages of an espresso shot instead of holding one fixed pressure the whole time.
A traditional pump machine pushes water through the coffee at a constant 9 bar from start to finish. A pressure-profiling machine lets you change that number on a curve: maybe a soft 2 to 3 bar to wet the bed, a ramp up to a 6 to 9 bar peak to drive extraction, then a decline back down toward the end. You are shaping a pressure graph over time, and that graph changes how the coffee tastes.
The 9-bar standard is not a law of physics. It is a historical accident. Achille Gaggia's spring-lever patent was filed on 8 August 1947, and the spring in those machines drove the piston to produce up to around 9 bar. When the Faema E61 group (invented by Ernesto Valente, introduced in 1961) brought the electric pump, it pushed water through the coffee at a constant nine bar, and that number became the default parameter for Italian espresso. We have been living with a number that was set by spring tension three-quarters of a century ago.
What is flow profiling?
Flow profiling is the practice of varying theflow rateof water (how many millilitres or grams pass through the coffee per second) across the stages of a shot.
Instead of telling the machine "hold 9 bar," you tell it "deliver 4 mL per second" or "start slow, then open up." Pressure becomes whatever it needs to be to keep that flow steady. Many flow-control setups use a needle valve (a paddle you turn) to physically restrict how fast water moves through the group. More advanced machines do it in software, with the pump itself adjusting speed to trace a flow curve you have programmed.
If pressure profiling is steering by the pressure gauge, flow profiling is steering by the flow meter. Same road, different dial.
What's the difference between pressure profiling and flow profiling?
The difference is which variable you control directly and which one you let float. Everything traces back to one relationship that governs every espresso shot:
Pressure = Flow × Puck Resistance
You can pin down any one of these and the other two sort themselves out. Pressure profiling fixes the pressure and lets flow rise as the puck erodes. Flow profiling fixes the flow and lets pressure fall as the puck erodes. Puck resistance, set by your grind, dose, and tamp, is the part you are reacting to in both cases.
Pressure profiling vs flow profiling at a glance| Pressure profiling | Flow profiling | |
|---|---|---|
| You control | Water pressure (bar) | Water flow rate (mL/s or g/s) |
| What floats | Flow rate | Pressure |
| Feels like | "Hold 6 bar, then decline" | "Hold 4 mL/s the whole shot" |
| Common on | Lever machines, paddle machines, gear-pump machines | Flow-control needle valves, gear-pump and software machines |
| Best at | Mimicking the classic lever curve | Healing channels mid-shot, taming acceleration |
Here is the part that trips people up. On a machine that holds pressure constant, the flow raterisesduring the shot. As coffee dissolves and washes out, the puck loses mass and gets more porous, so its resistance drops. To keep pushing the same 9 bar through a weakening puck, the machine has to send more and more water through it, exactly when the bed is least able to handle it evenly. That is the late-shot acceleration that flow control was invented to stop. Control the flow instead, and you prevent the puck from being blasted right when it is most fragile.
For most home setups the two approaches overlap heavily, and plenty of people use the terms loosely. As Lance Hedrick puts it, you cannot get pressure without input flow and resistance, so changing one always moves the other. The distinction matters most when you want a specific behaviour: flow control is the better tool for fixing channels mid-shot, while pressure control is the more intuitive way to recreate the lever-style curve as an example.
The science behind pressure and flow profiling
This is where the rewrite earns its keep. Most articles on this topic cite blogs citing other blogs. The last few years have produced actual peer-reviewed research on espresso extraction, and the findings are more interesting (and more humbling) than the marketing suggests.
Flow rate has the strongest effect of the three "dials," but brew ratio beats them all
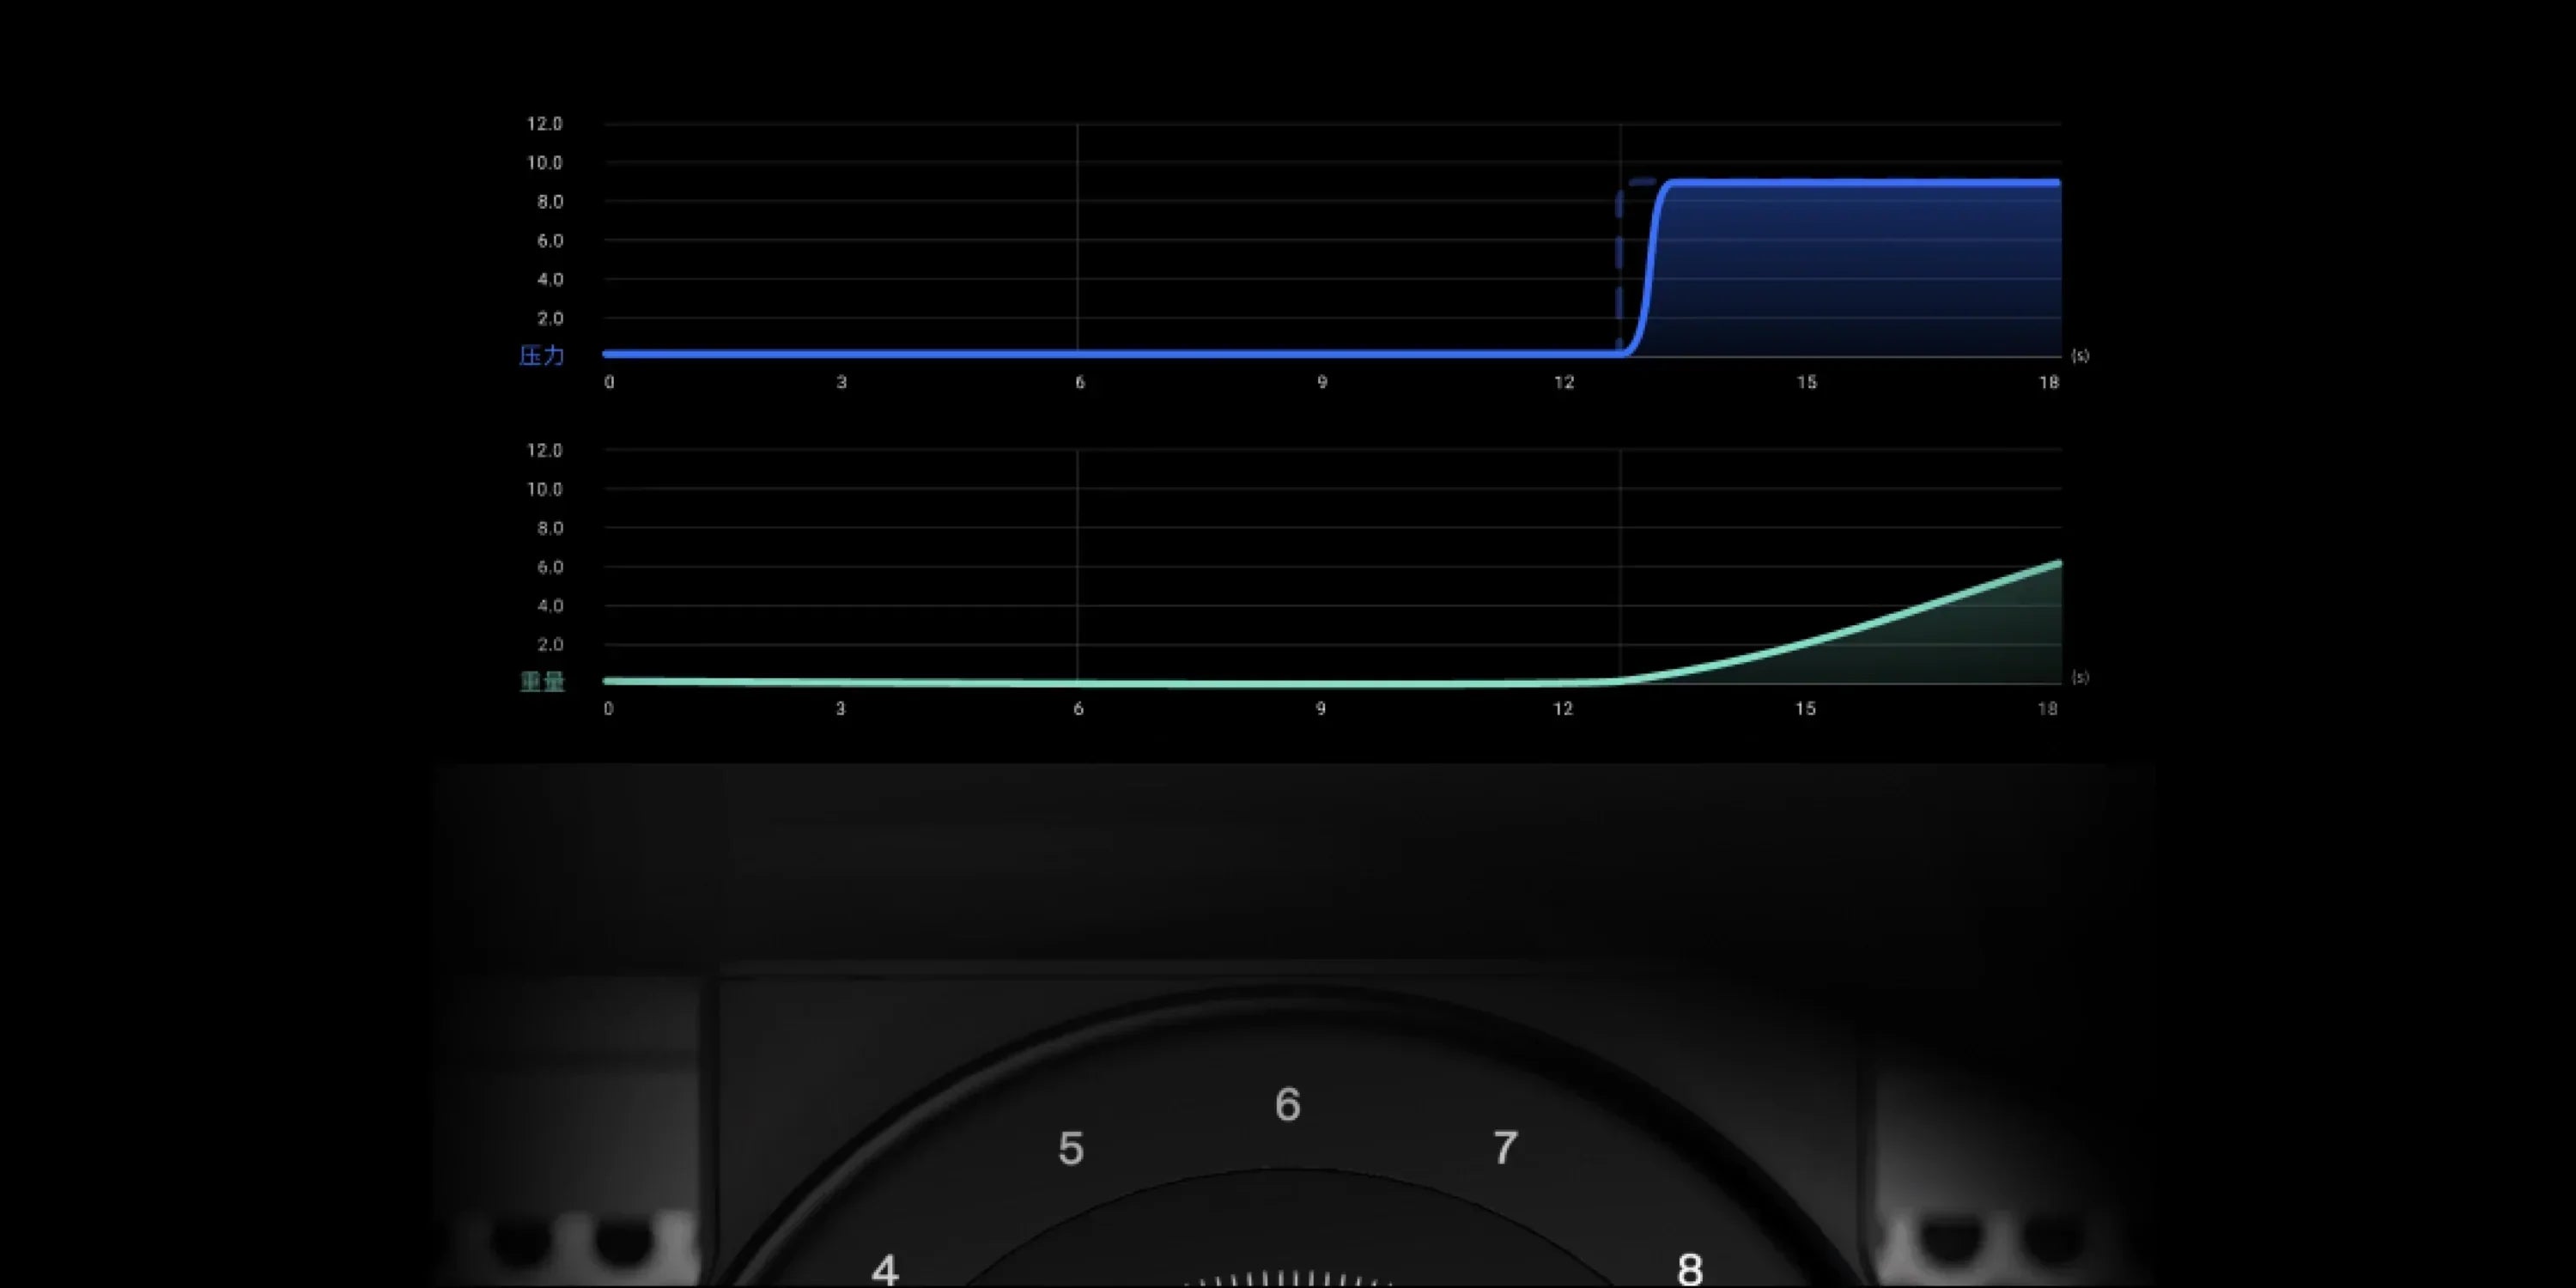
A 2023 study in the journalFoodsby a team at the Technical University of Munich (Schmieder and colleagues) ran a controlled experiment on a Decent DE1 Pro, varying flow rate, grind, and temperature while measuring four compounds (trigonelline, caffeine, 5-CQA, and total dissolved solids) across ten fractions of each shot.
Their headline finding: of the three process parameters they studied,flow rate had the strongest effect on what ended up in the cup.Pushing flow from 1.0 to 3.0 mL/sdecreasedthe mass of every compound measured. Slower flow gave a higher initial concentration that then dropped off faster; faster flow gave a lower, flatter extraction. So slowing the flow front-loads richness, which is exactly the lever-style intuition baristas have followed for decades.
The authors concluded that brew ratio "is the first parameter to control with high accuracy before optimising the process parameters flow rate, grinding level and water temperature." The effects of flow, grind, and temperature wereminorcompared with the effect of simply changing your ratio of coffee to liquid. Profiling is real. It is just not the first lever you should reach for.
Grind, pressure, and the "extraction volcano"
The 2020 paper that reframed the whole conversation is Cameron and colleagues' "Systematically Improving Espresso," published inMatter(a team that included coffee scientist Christopher Hendon). They built a mathematical model of water moving through a coffee bed and tested it against real shots pulled on a commercial machine.
The model, assuming water flows evenly through the puck, predicted that grinding finer should always raise extraction. The experiment said otherwise. Extraction yield rose as the grind got finer, peaked at around grind setting 1.7 on their grinder, and thenfellat finer settings. Plot it and you get a volcano shape, not a ramp.
Why does extraction drop when you grind finer than the peak? Because too-fine grinds cause uneven, partially clogged flow. Water finds the path of least resistance and channels through, over-extracting some regions while barely touching others. The cup tastes bitter and sour at the same time, which is the unmistakable signature of channeling. And most baristas grindfinerthan that peak, partly to hit the old 20-to-30-second shot times, which means a lot of espresso is being pulled in the clogged, wasteful regime without anyone realising it.
The fix the researchers found is directly relevant to profiling. When they dropped the water pressure from 9 bar to 6 bar, the choking eased, a wider range of grind settings became usable, and extraction got both higher and more consistent. Lower pressure widened the window. They were able to cut coffee mass per drink by about 25% while keeping quality. This is the strongest evidence in the literature that managing pressure, not just grinding finer and pushing harder, is what actually controls extraction uniformity.
There is also a measurable link between grind and pressure that has nothing to do with surface area. In theFoodsstudy, grinds with nearly identical particle sizes still produced very different brew pressures: 3.8 bar at the coarse setting, 7.4 bar in the middle, and 9.3 bar at the fine setting. Finer grind, higher pressure, more risk of clogging. The two dials are tangled together.
The mathematically "optimal" profile looks a lot like what baristas already do
A more recent optimal-control analysis by Doron Rainish worked out, from the extraction physics, what the theoretically ideal flow profile should be. The answer comes out as a three-stage shape: a low-or-zero-flow wetting stage to charge the bed, then a steady mid-level flow stage that does the efficient extraction work, then a short high-flow stage at the end.
If that sounds familiar, it should. The author notes the optimal profile is "not entirely different" from the practices the professional and home barista community already developed through years of trial and error, and that it begins only once the bed is fully soaked, which is why a pre-infusion stage gets added in practice. In other words: decades of barista tinkering arrived at roughly the right shape before the math confirmed it. The modelled gain over a flat profile is modest in extraction yield, with the larger benefit showing up as savings in extraction time and throughput rather than dramatic flavour leaps.
Why this is real science now, not cafe folklore
It is worth knowing why peer-reviewed espresso research suddenly exists. Christopher Hendon, a computational chemist at the University of Oregon who appears on several of these papers, got into coffee through the cafe Colonna and Smalls in Bath, working with barista champions Maxwell and Lesley Colonna-Dashwood. That collaboration produced the 2014 paper on dissolved cations in coffee water (calcium and magnesium pull out flavour and body; bicarbonate buffers it) and the bookWater for Coffee. The point is not the water chemistry itself. It is that the people pulling competition-winning shots and the people running the lab finally started talking to each other, and espresso extraction became a field you can actually cite.
How pressure and flow profiling affect your coffee
Pressure and flow profiling change the cup in four practical ways: how evenly the coffee extracts, how you can tailor a shot to a specific roast, how much body versus clarity you get, and how repeatable your results are.
- Extraction evenness.A gentle pre-infusion lets the grounds swell and settle into an even bed before full pressure hits, and holding flow steady stops the late-shot acceleration that tears channels open in a weakening puck. Even extraction is the difference between a shot that tastes balanced and one that is simultaneously sharp and bitter.
- Roast tailoring.Light roasts are dense, less soluble, and prone to falling apart and channeling under a hard 9-bar hit. A gentler approach (longer pre-infusion, a lower peak around 6 to 8 bar) lets you extract them properly without blowing the puck apart. Darker roasts are softer and more soluble, so they tolerate and sometimes want a more standard profile.
- Body versus clarity.Higher pressure and slower flow tend to push more dissolved solids and emulsified oils into the cup, giving a heavier, syrupy body. Lower pressure and faster flow lean toward a cleaner, brighter, more tea-like cup (the "turbo shot" idea: coarser grind, around 6 bar, a fast 10-to-16-second pull). Neither is correct. They are different drinks.
- Repeatability.Once you find a profile that works for a specific coffee, you can pull it again. Profiling gives repeatable shape, which is genuinely useful when you are dialling in a new bag and want to change one thing at a time.
The honest part: how much does profiling actually matter?
Not everyone is sold, and the skeptics have a point worth hearing. James Hoffmann, who experiments with pressure profiling himself, has said that flavour-wise he finds it "only a small benefit," that a declining profile ending around 6 bar "doesn't produce spectacularly better shots, but does seem to reduce bitterness," and that perhaps its best benefit is simply slowing the flow at the end so you have more time to decide when to cut the shot. The community shorthand attributed to him: better coffee will beat a better brewer, every time.
On the other side, Scott Rao is a committed advocate, especially of flow control. He describes how, on a steady-pressure machine, "the resulting flow rate rises as the puck erodes," creating "erratic flow paths late in a shot" that decrease extraction and increase bitterness and astringency. He is particularly enthusiastic about a pause after pre-infusion, calling it "the biggest win-win I can imagine in espresso extraction" because it increases extraction while reducing astringency and bitterness.
Both can be right at once. Profiling is a meaningful tool that is most valuable for light roasts, channeling control, and consistency. It is also true that your beans, grinder, ratio, and puck prep determine most of the cup before profiling enters the picture. The reasonable position: dial the fundamentals first, then use profiling to refine.
The best espresso machines for pressure profiling
Before naming specific machines, it helps to know the four ways a machine can give you profiling control, because the category tells you what kind of control you are buying:
- Spring-lever machinesproduce a natural declining-pressure curve for free. You charge the chamber, then the spring drives the piston, pressure peaks around 8 to 9 bar and tapers to 2 to 4 bar. This is the original espresso profile; the flat-9-bar pump shot is the deviation from it.
- E61 with a flow-control kitadds a needle-valve paddle to a classic group. You manually restrict flow, which indirectly profiles pressure. Cheap to add, fully manual, best paired with a pressure gauge for feedback.
- Programmable paddle and electronic machinesdrive the curve through software or a paddle that control vibratory bump or dual pumps and some machines, letting you save profiles.
- Gear-pump machinesare the most flexible. The pump itself varies its speed hundreds of times per second to trace whatever pressure or flow curve you have programmed, quietly and repeatably. This is true software profiling and some machine use electronic paddles.
Some of these machines we carry at Vellutto, with what each one actually does. We sell some of these machines, so keep this in mind, this is not a neutral ranking.
Espresso Machines That Empower Pressure Profiling
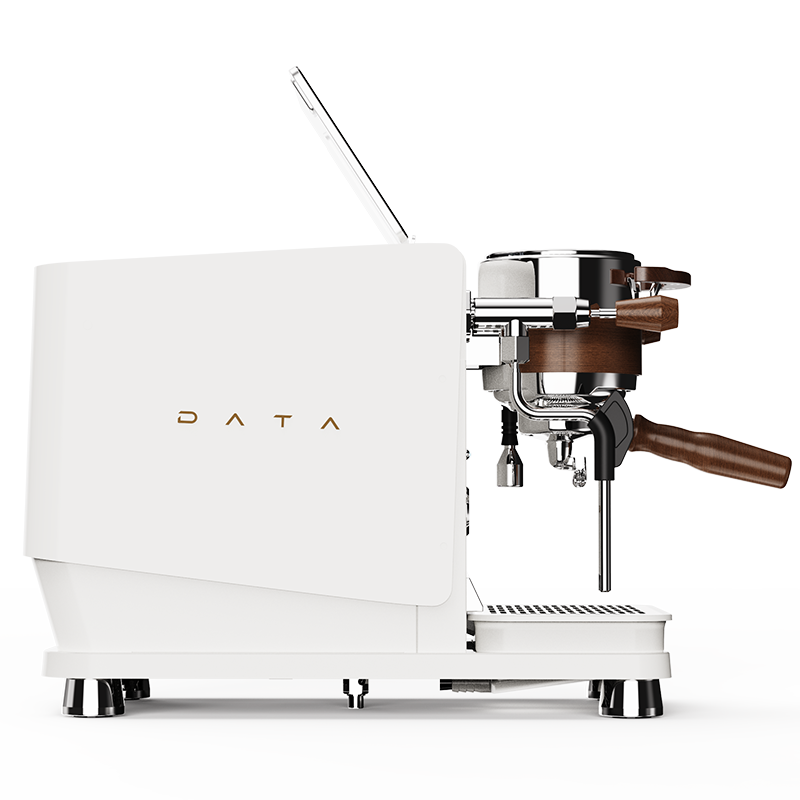
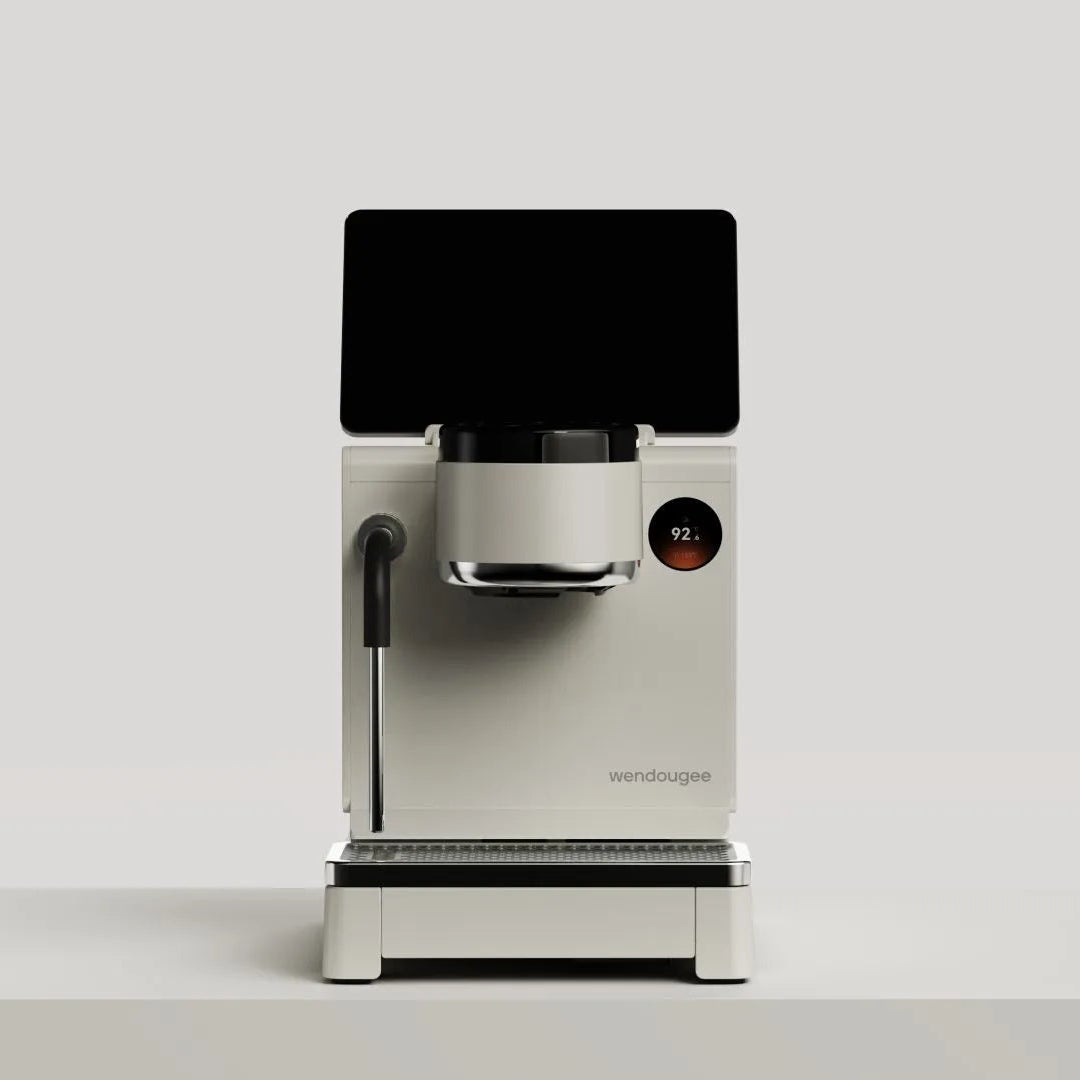
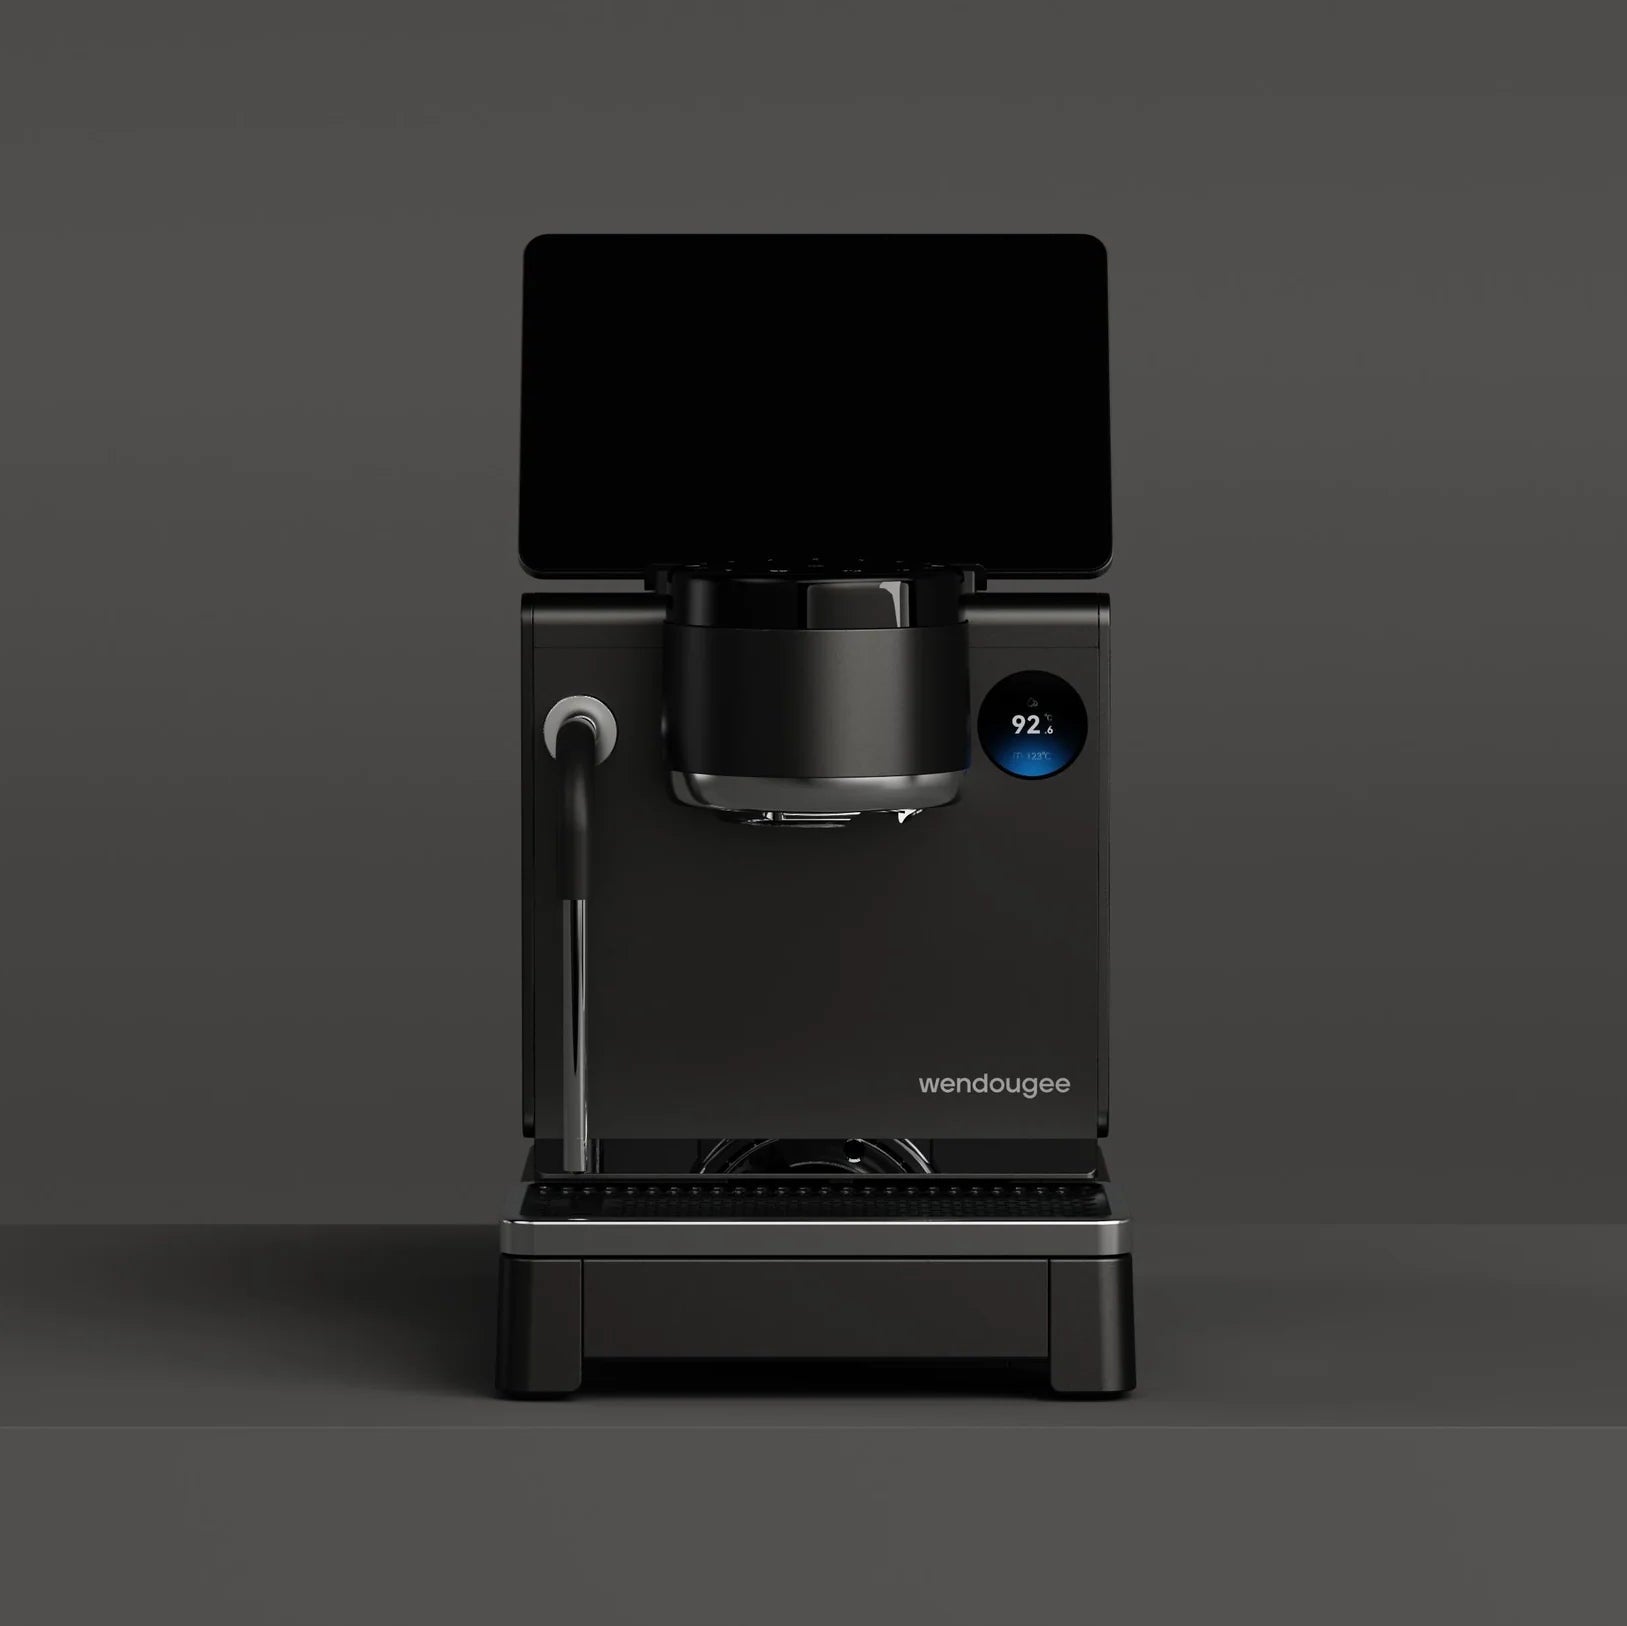
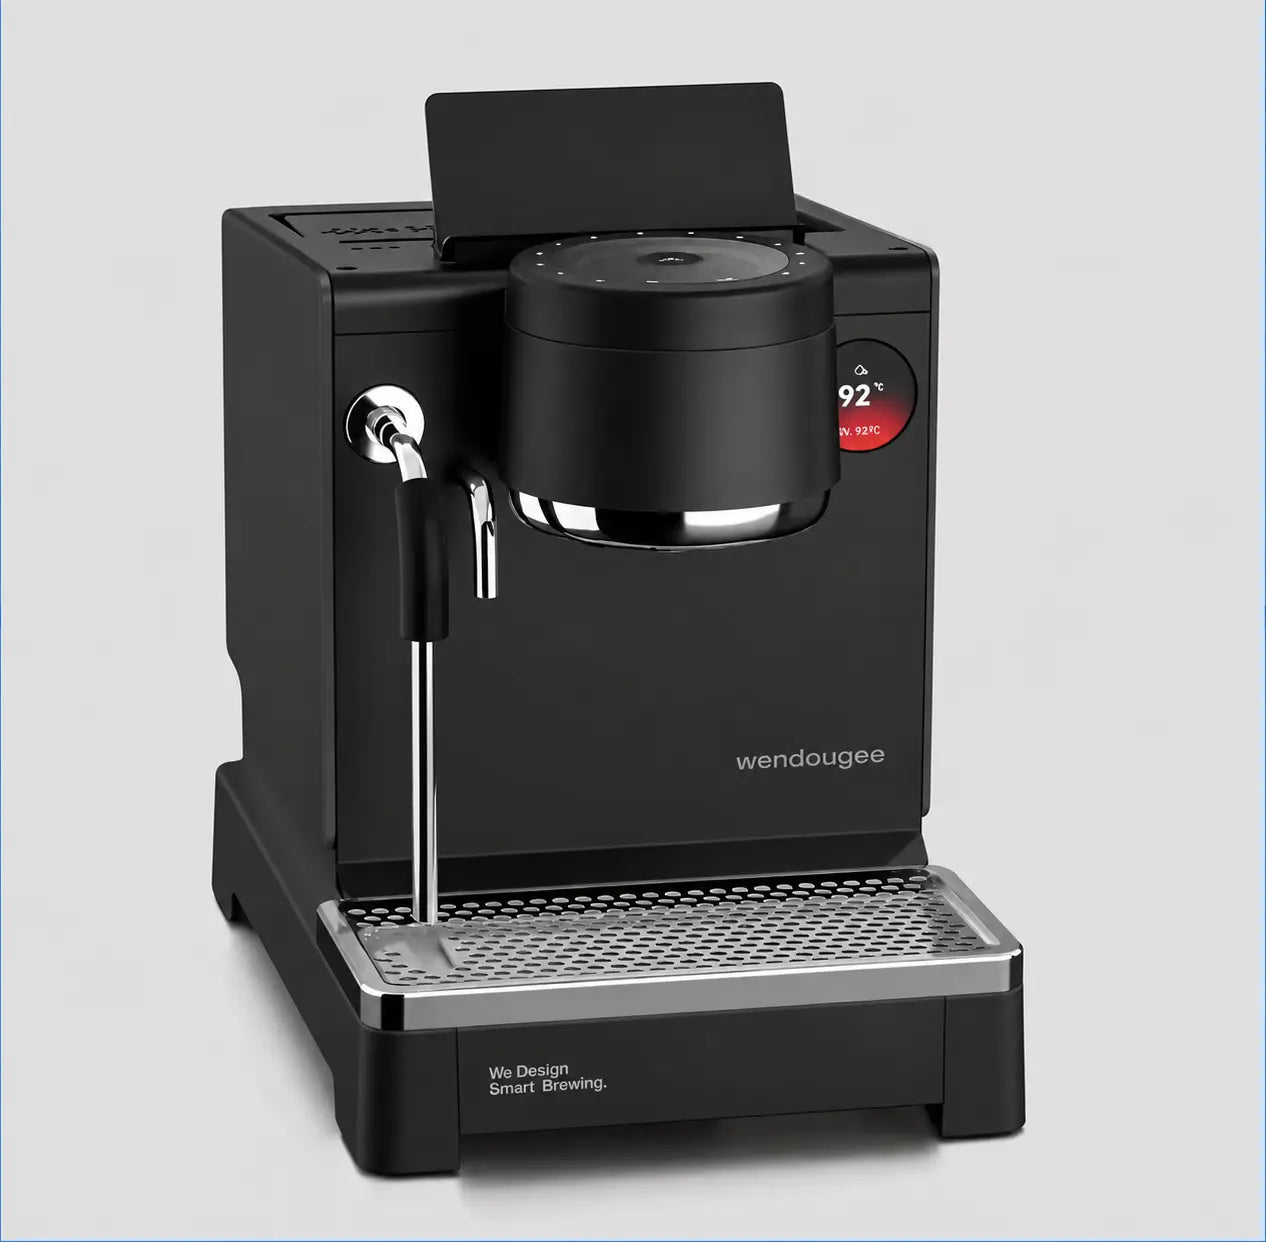
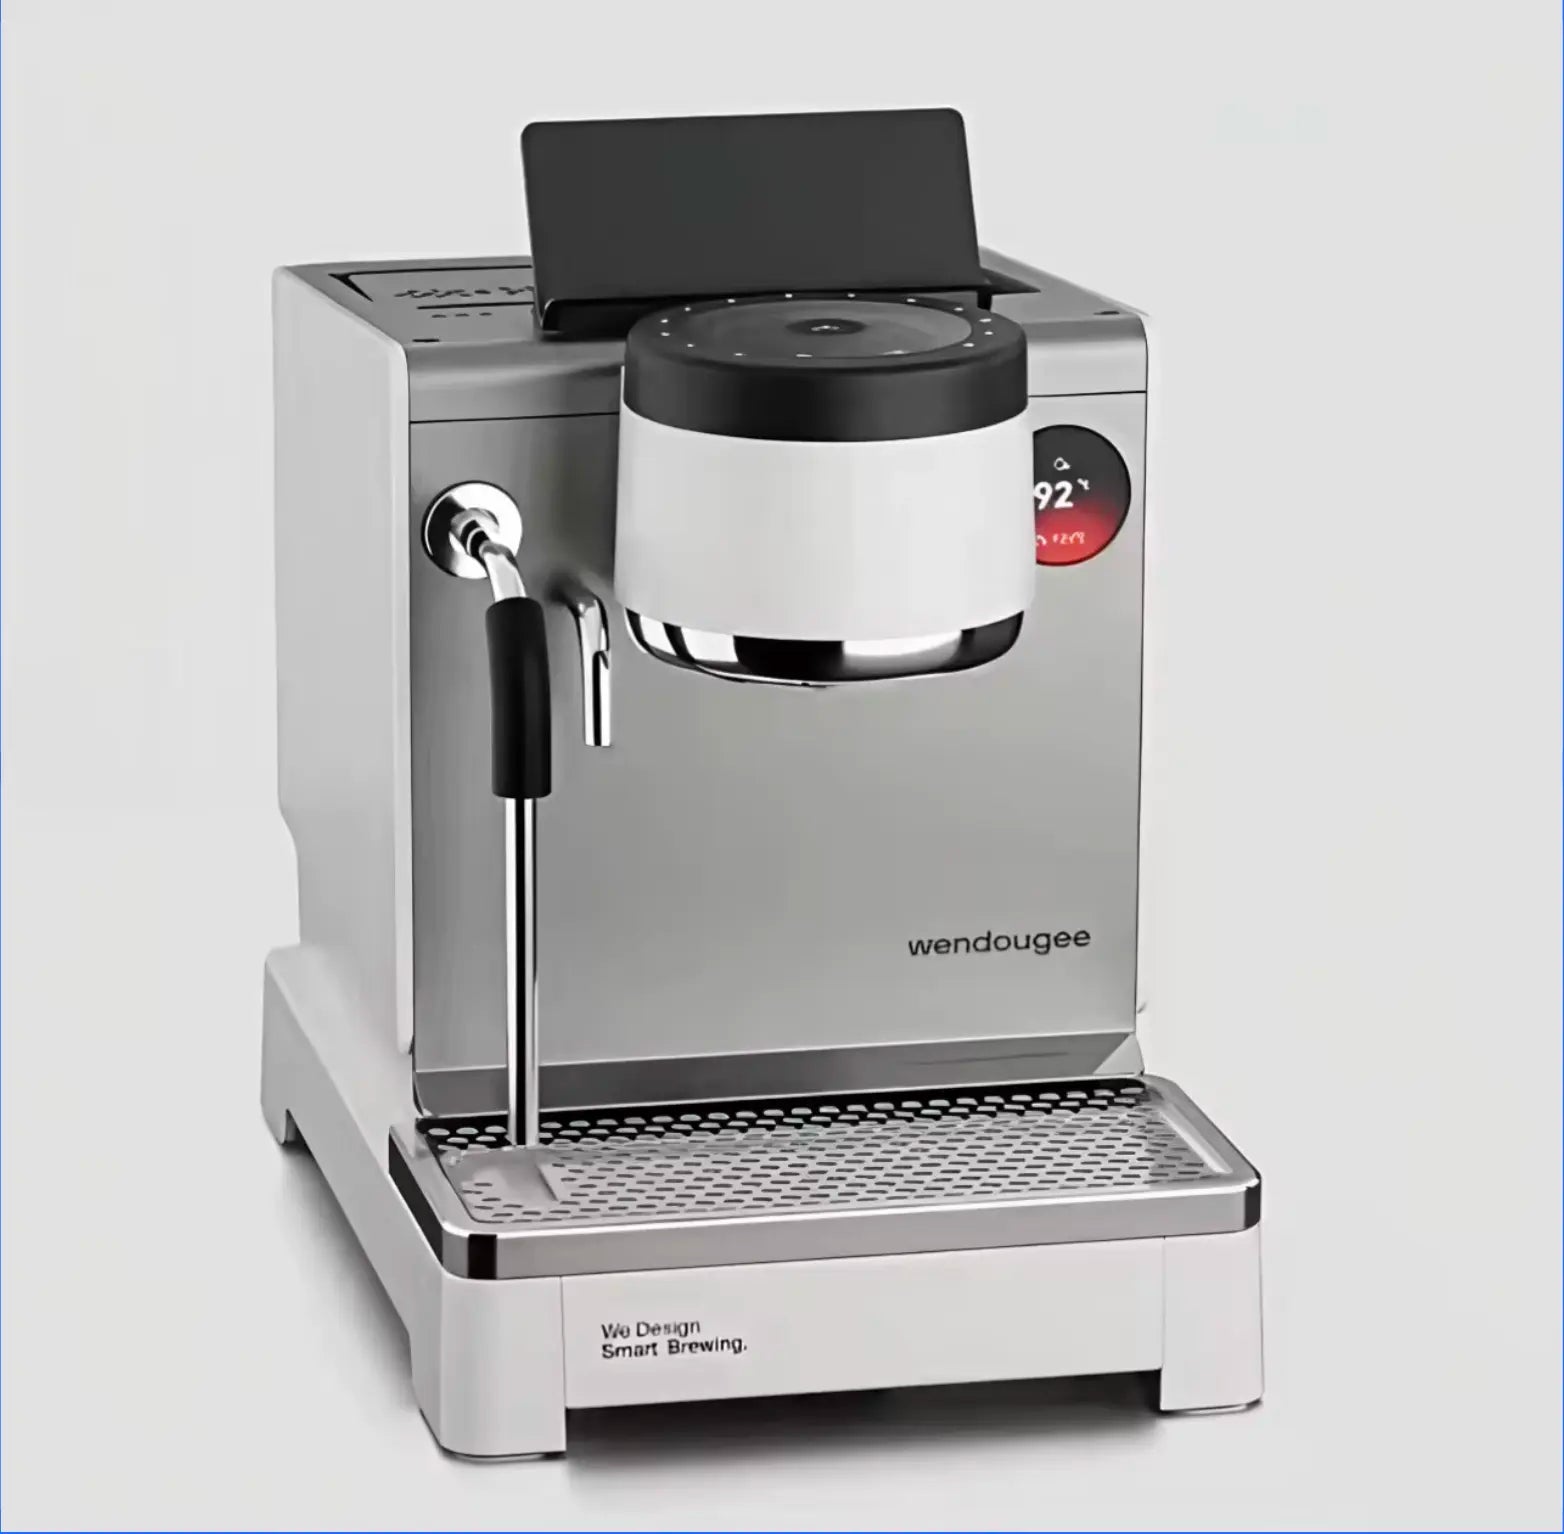
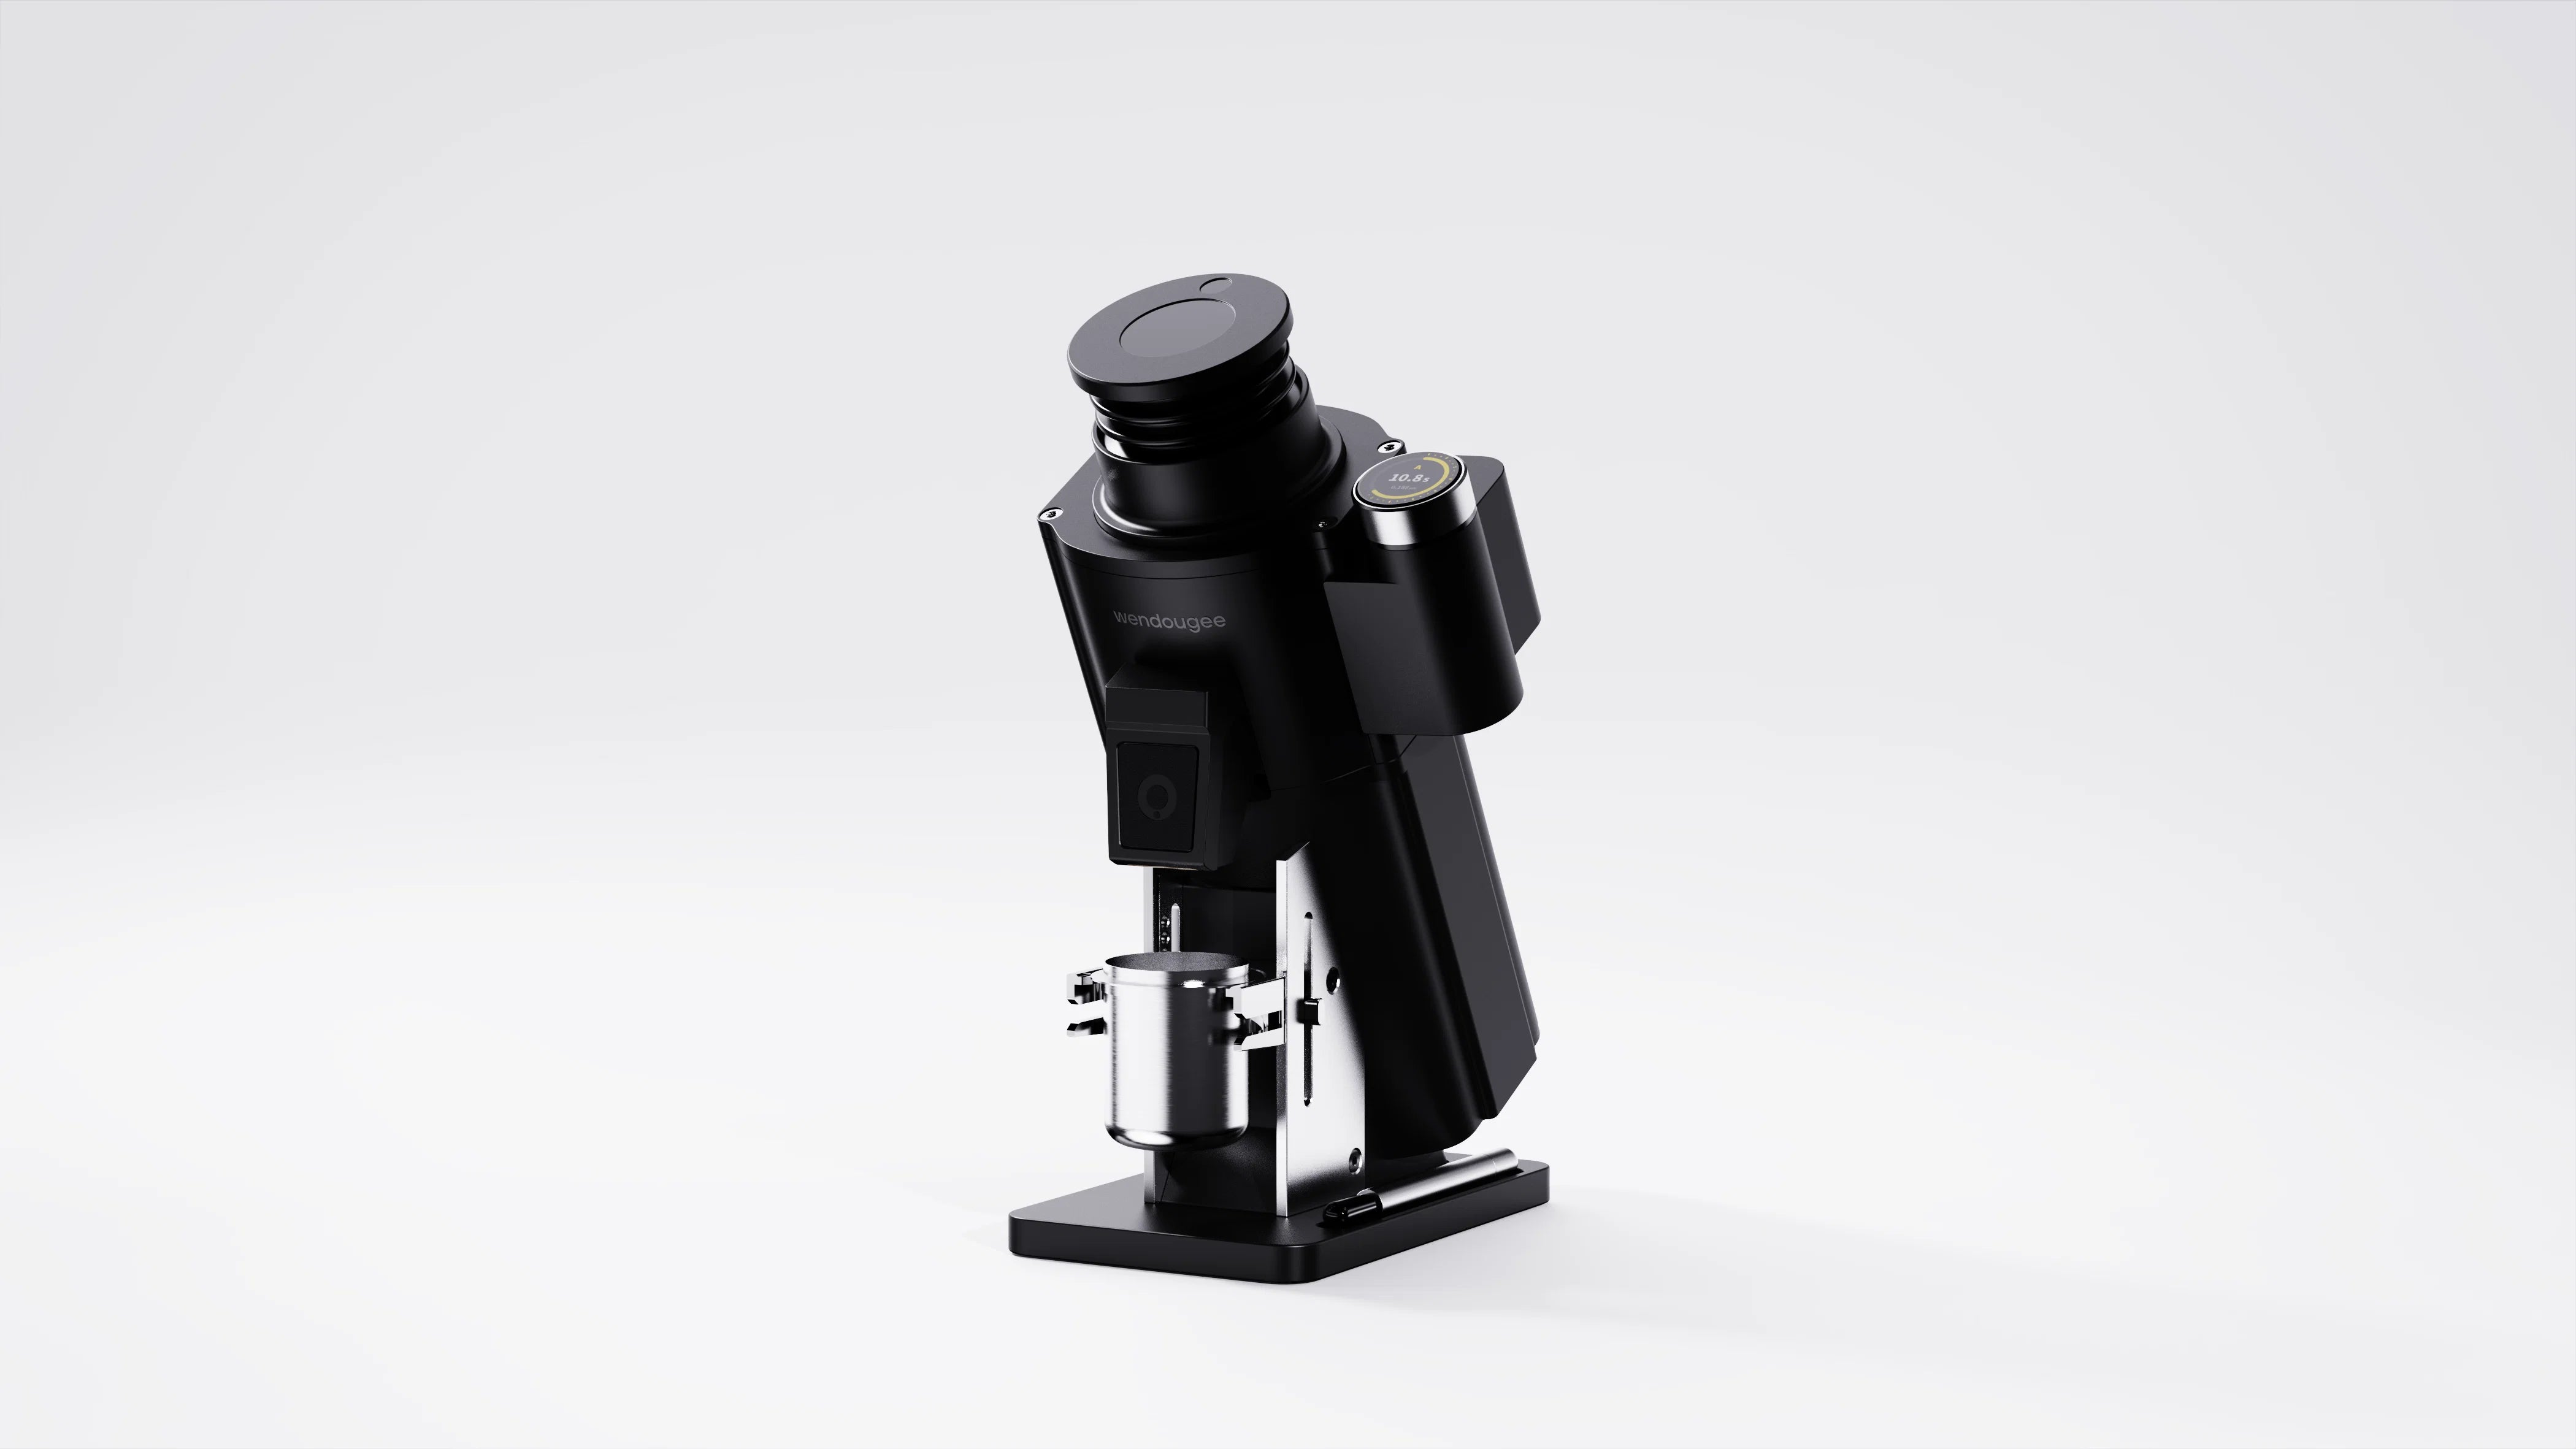
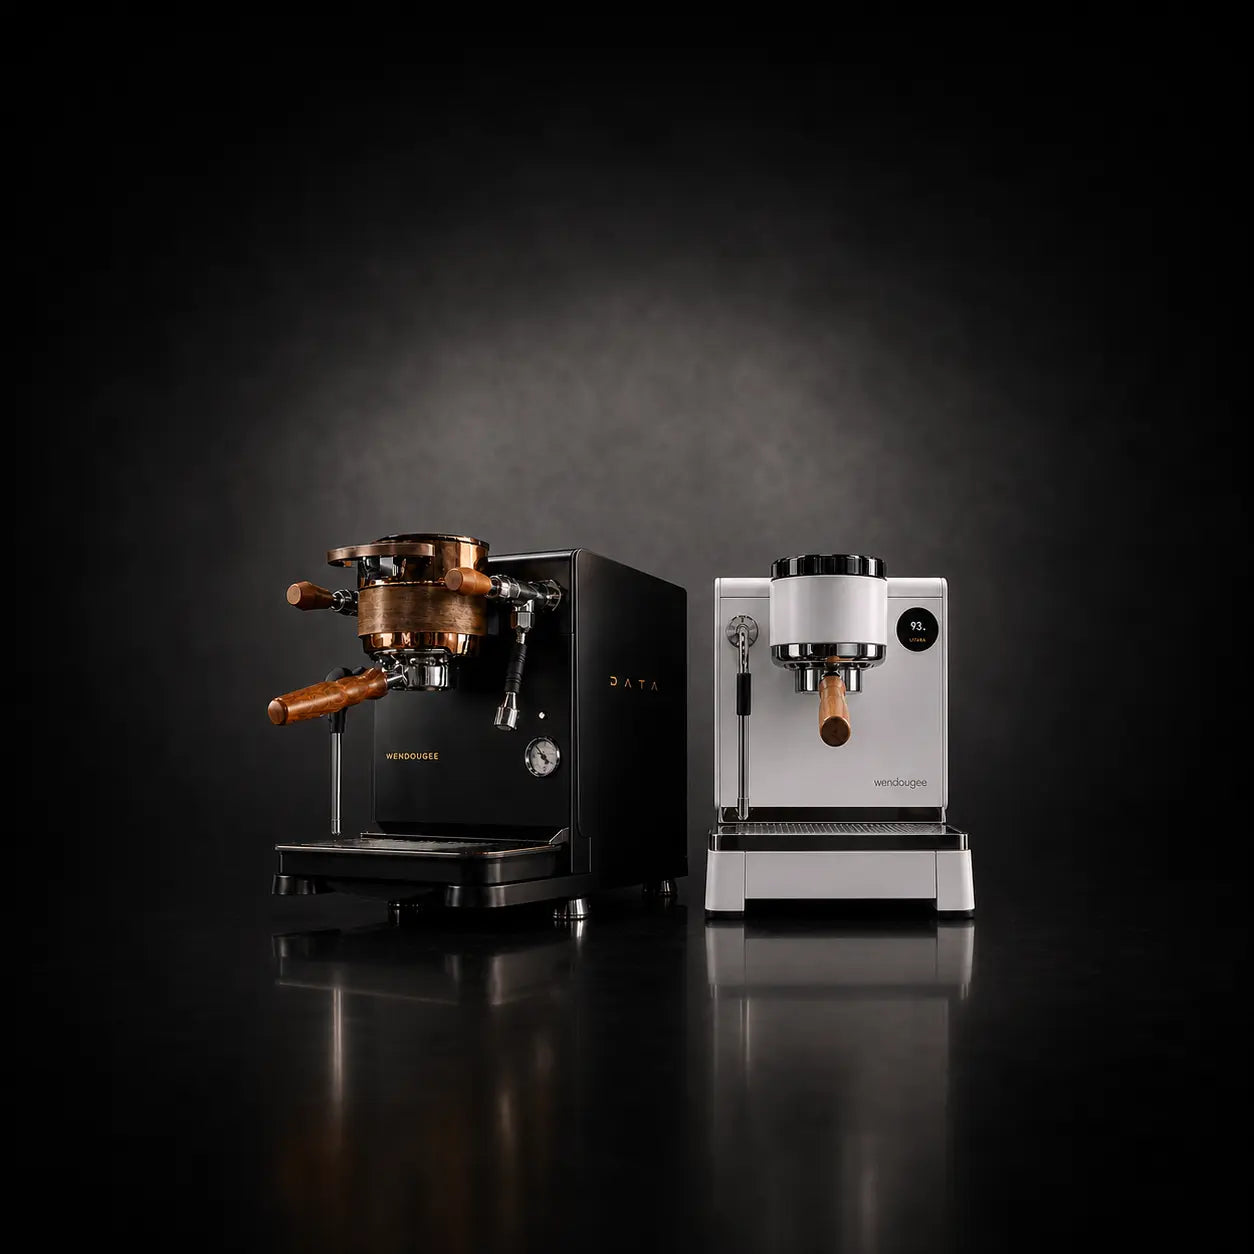
Wendougee DATA S
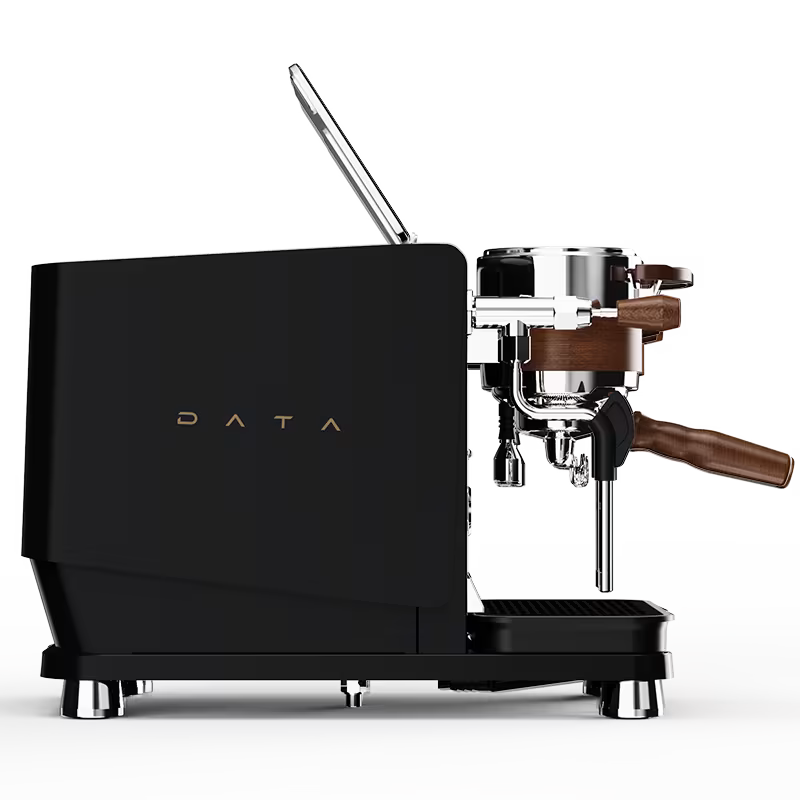
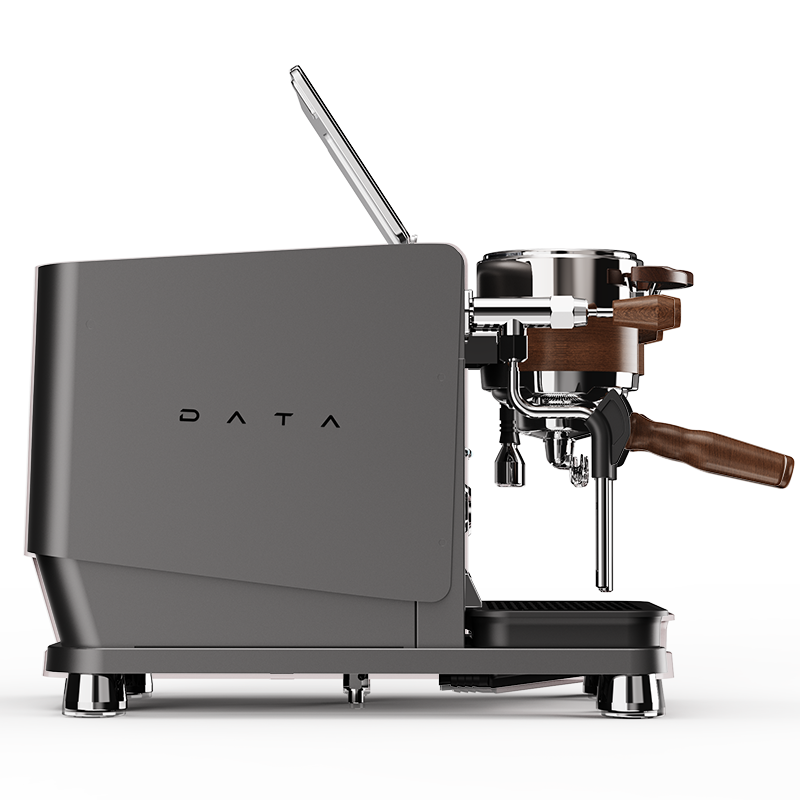
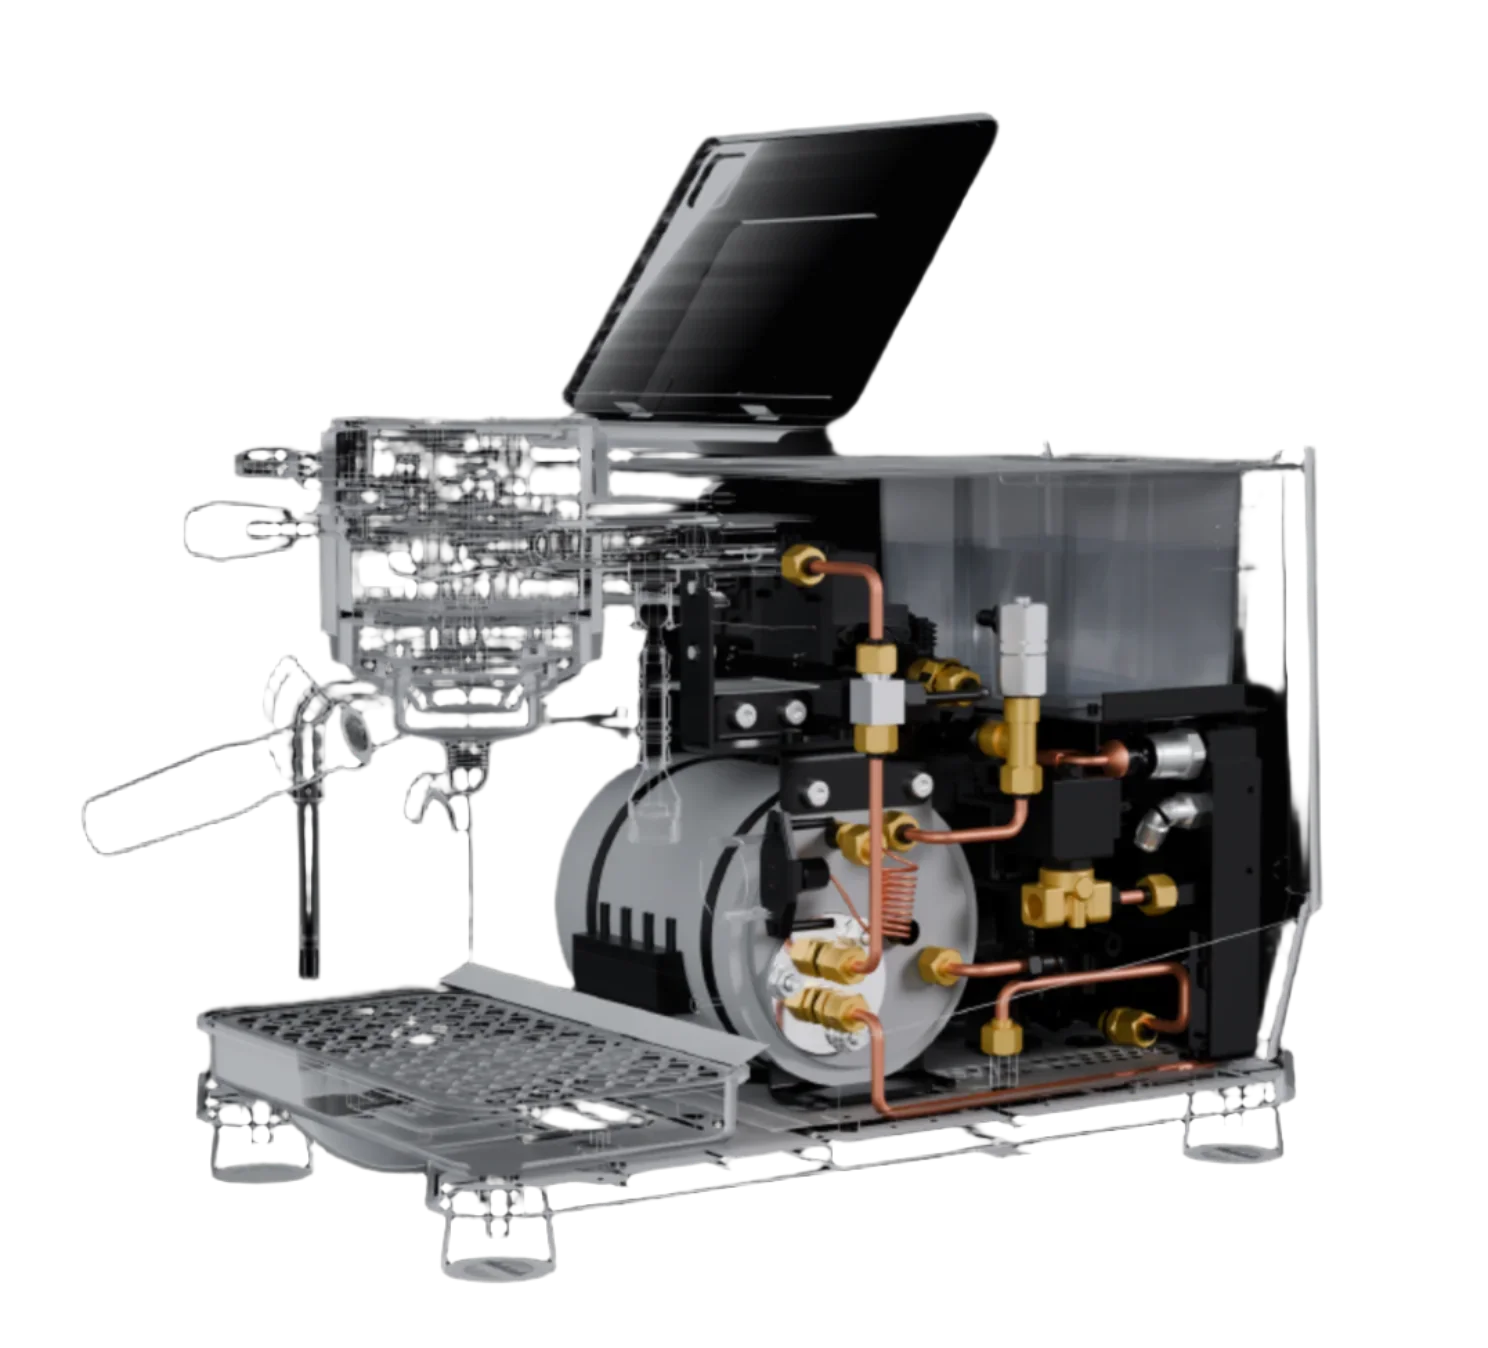
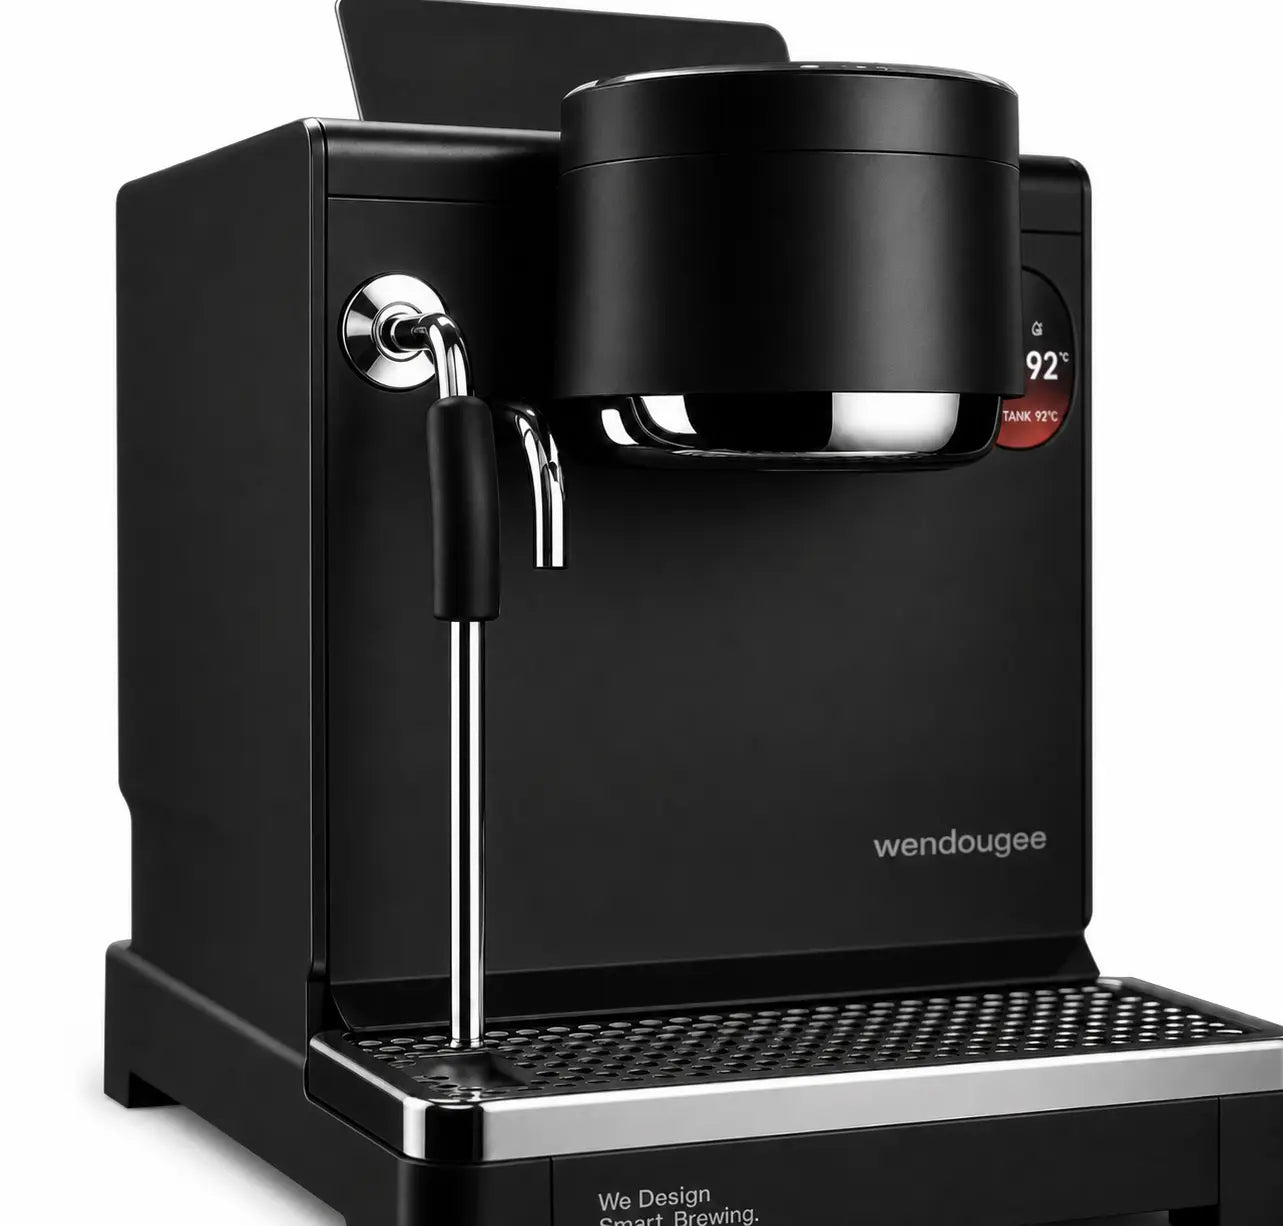
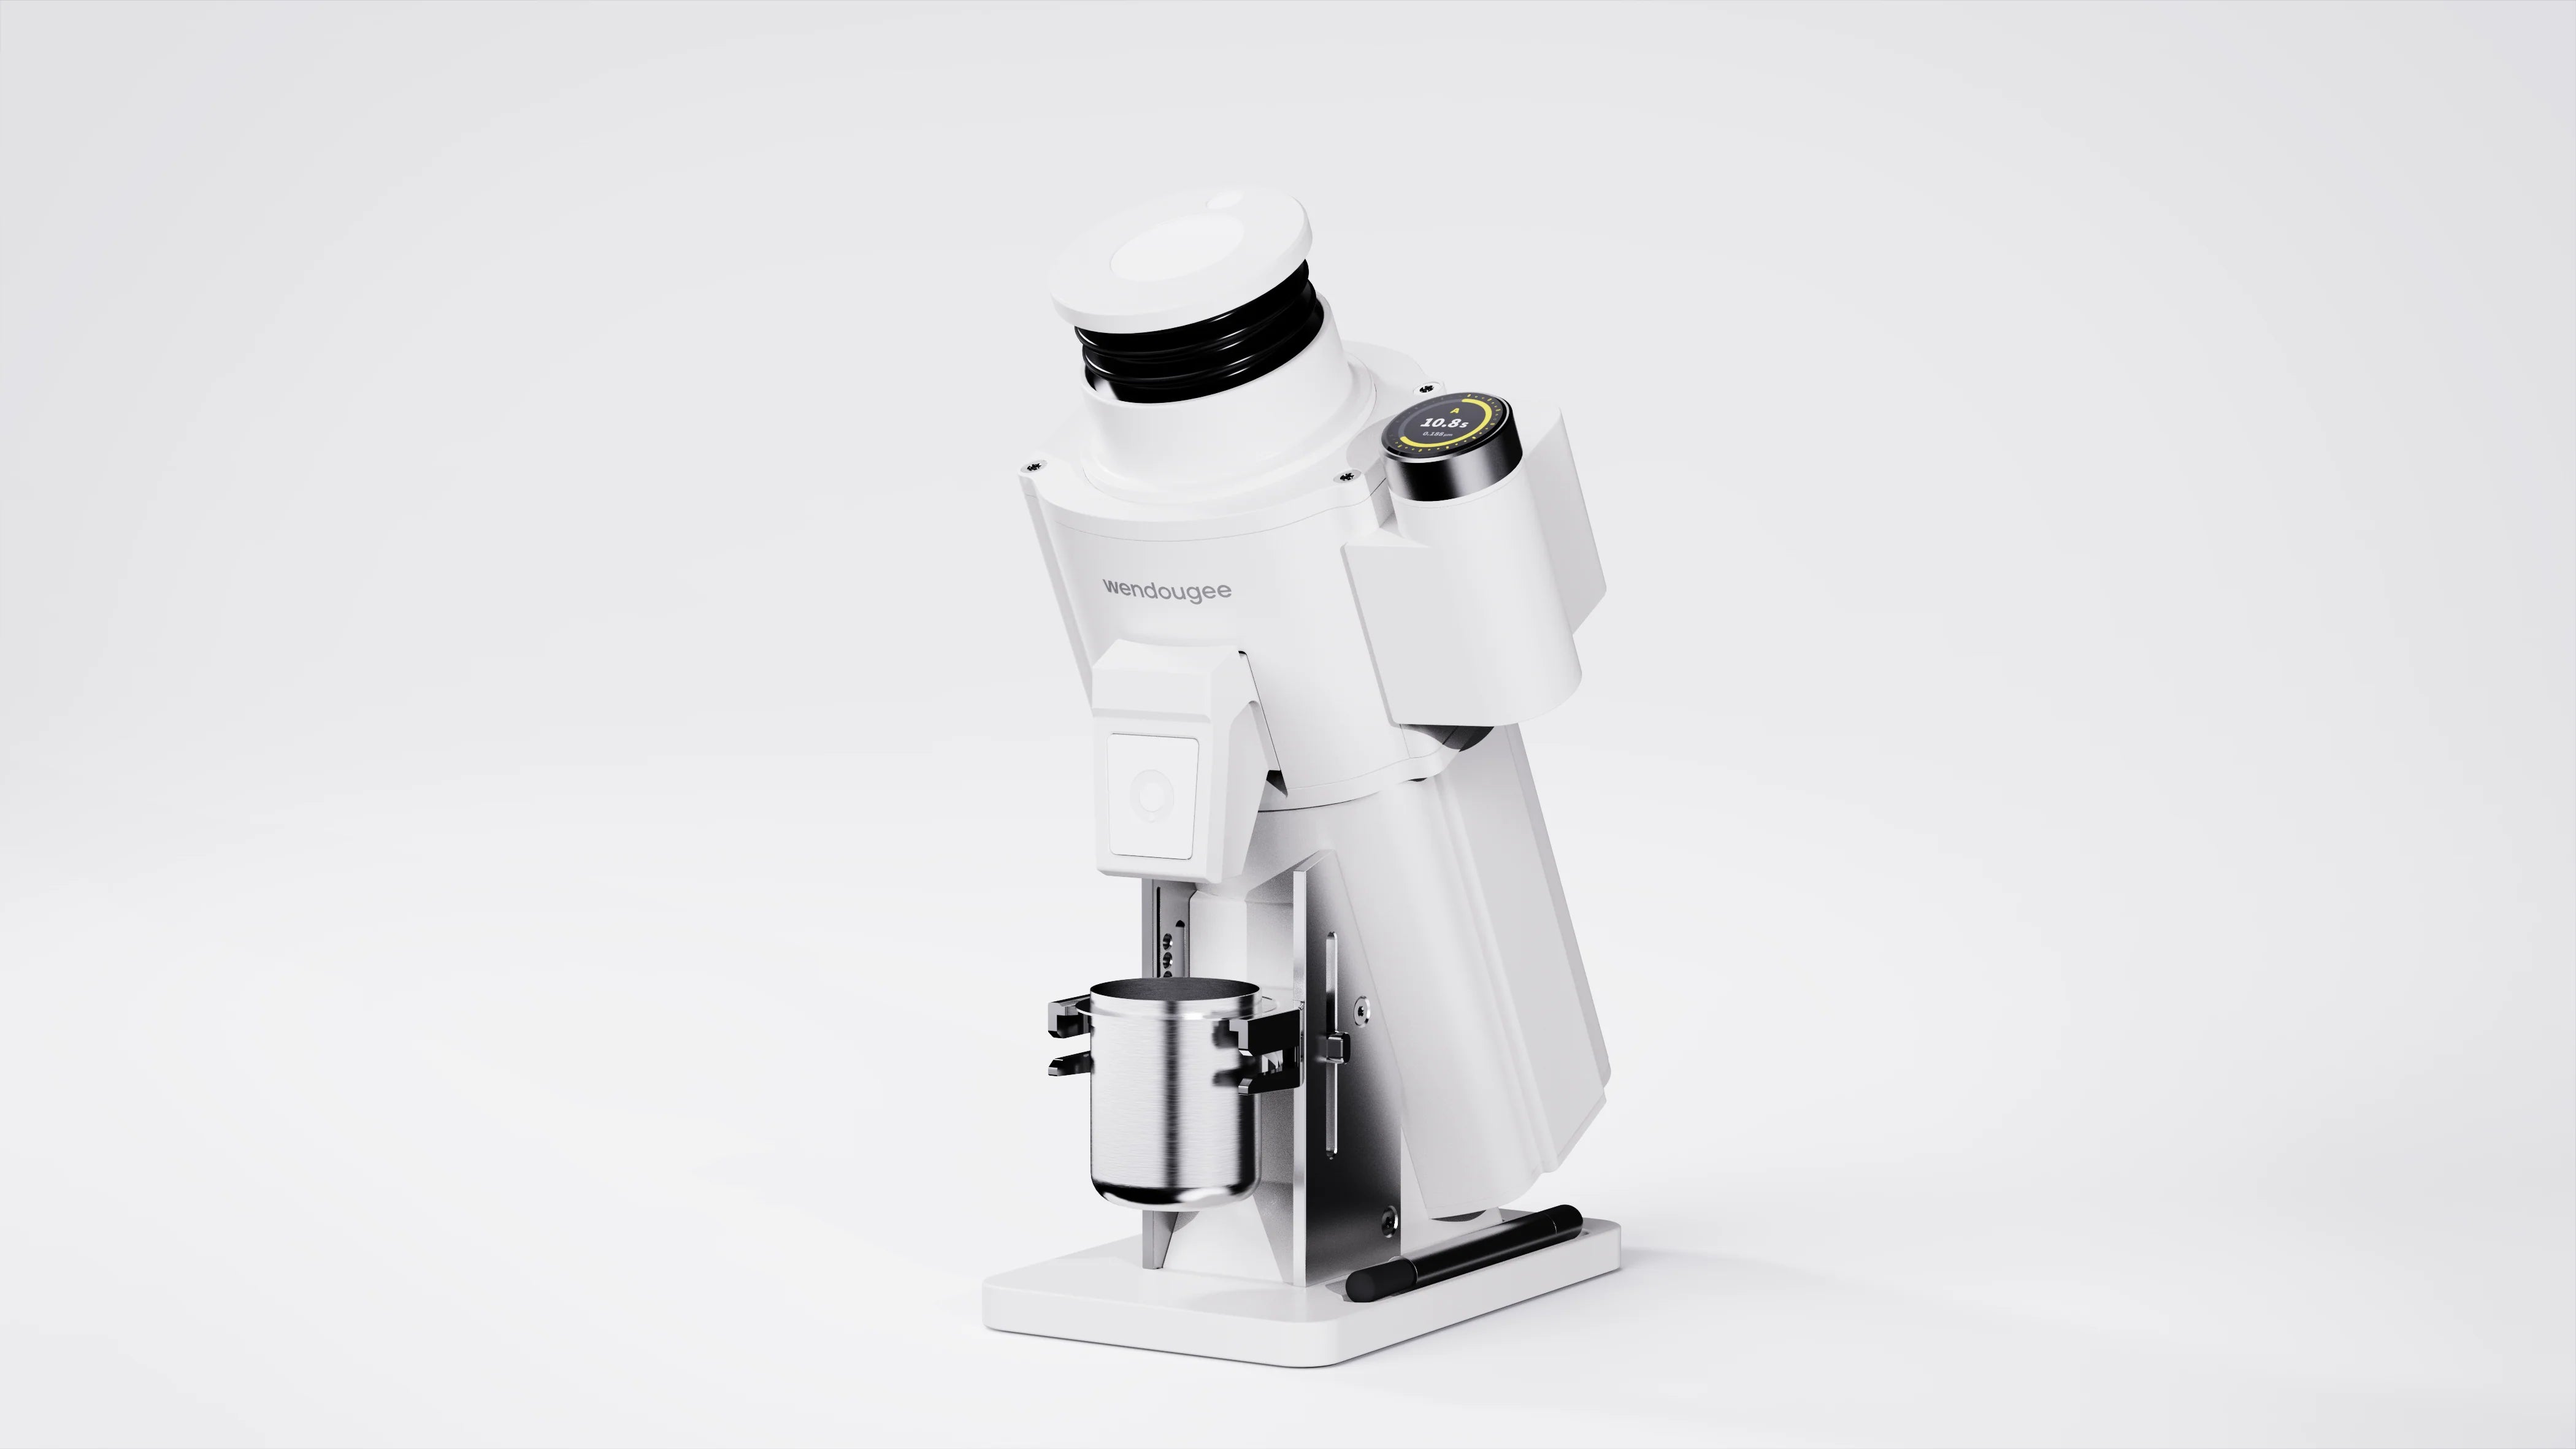
Smart Tech and Commercial Performance. The Data-S is Wendougee’s flagship dual-boiler machine and takes things to an even higher level. It’s built for the enthusiast who wants no compromise. This machine has a commercial-grade gear pumphat adjusts speed hundreds of times per second to follow a programmed pressure or flow curve capable of exceeding 9 bar (up to ~12 bar) for pressure profiling headroom with a needle valve capping flow at 12 mL/s. It pairs with a smartphone app (Wendougee E-Bar) that allows you to design and save custom pressure or flow profiles and even share or download profiles from the community. Essentially, the Data-S is like having a mini Strada or Slayer in your home, with modern smarts – you can program gentle pre-infusion, pressure ramps, flow limits, and see it all on a live pressure graph. It features a dual 316L stainless boilers (a 0.8 L saturated brew group plus a 1.8 L steam boiler) for extreme temperatures stability and strong steam performance alongside the profiling control, with German WIKA pressure sensing and an Italian GICAR flow meter feeding a volumetric stop. with robust build quality: all-metal internal plumbing and valves, no plastic fittings – built like a commercial machine inside for longevity. In fact, Wendougee markets it as an “end-game” machine for home baristas, meaning it could be the last espresso machine you ever need. Despite its high-end capabilities, it’s still priced significantly less than Italian commercial one-group machines. If you’re an espresso tech geek, the Wendougee Data-S offers an unparalleled sandbox to play in, from advanced features like pressure profiling and flow control to fast warm-up time and the ability to pull shot after shot with unwavering consistency. It’s café performance on the countertop.

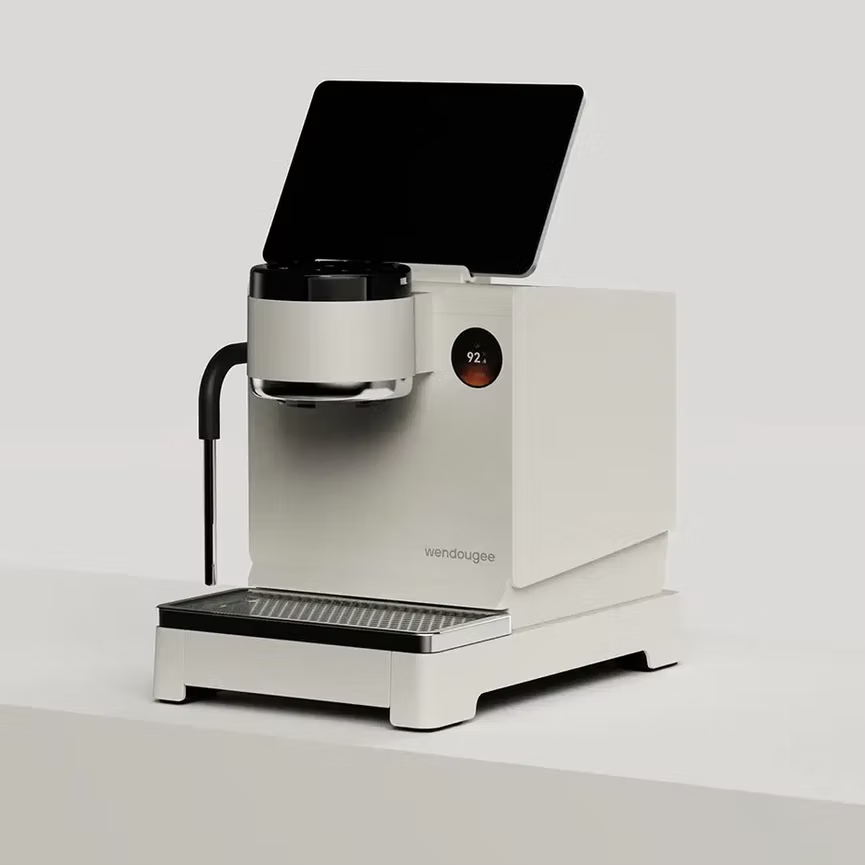
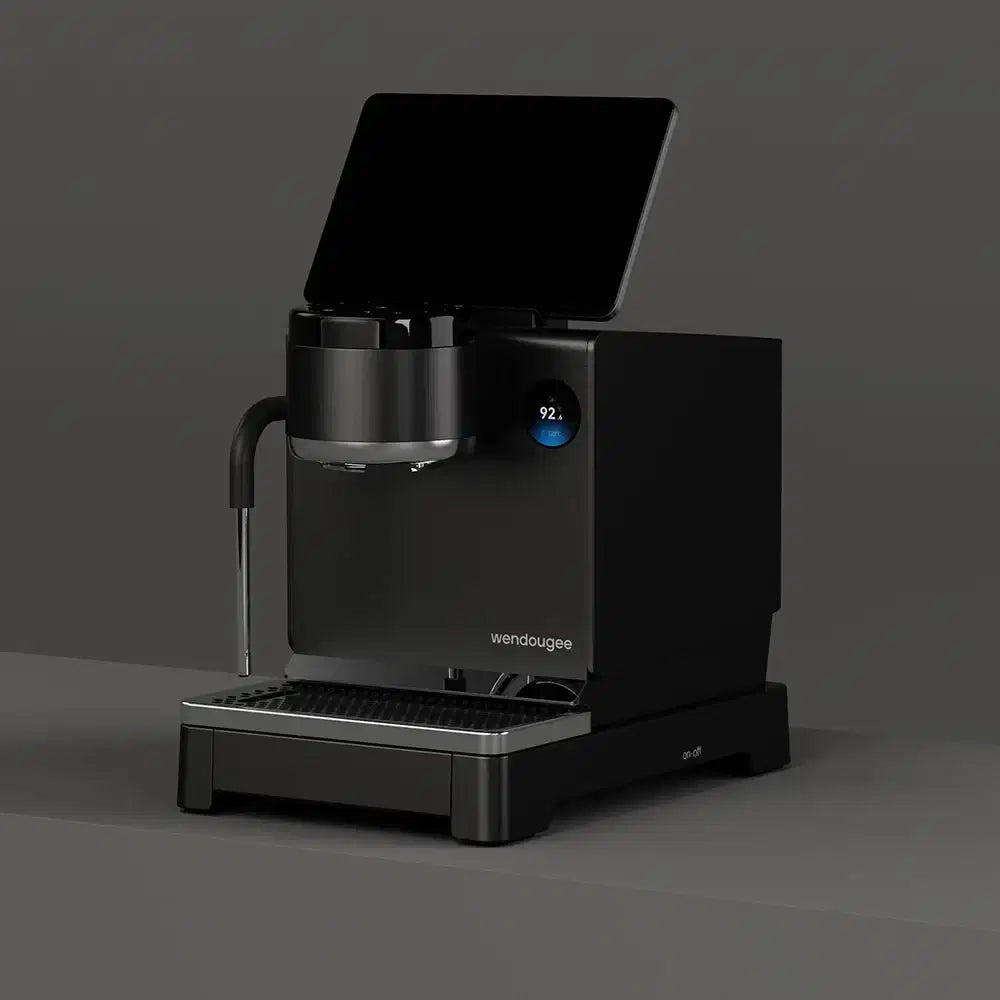
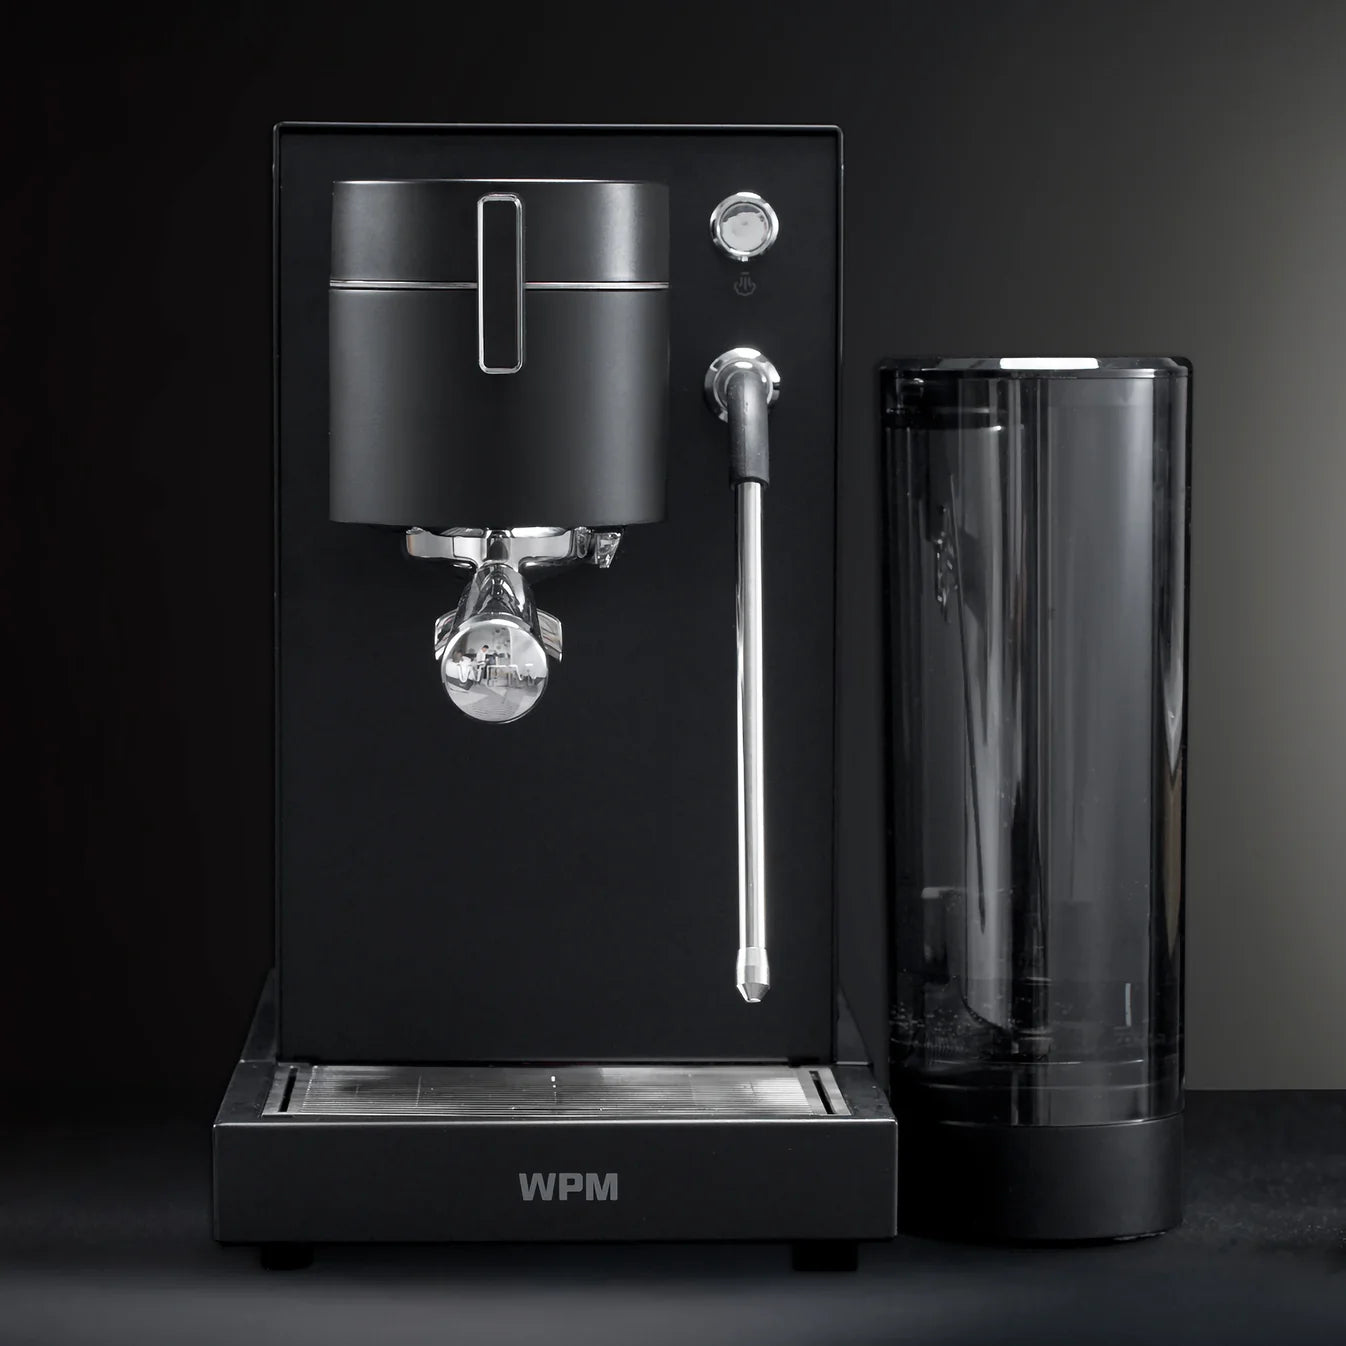
Wendougee LITA (BA and LA variants)
Best Bang-for-Buck Pressure Profiler. The Wendougee Lita is a premium dual-boiler machine that brings full pressure profiling to your kitchen at a relatively accessible price (around €2379).
The LITA is one machine line offered in different variants, not separate machines. The two we stock are the LITA BA and LITA LA; a LITA Sigma is coming but is not released yet.
the Wendougee LITA features an advanced digital pressure control system adjustable from 0–9 bar in 0.1-bar increments with a needle valve capping flow at 12 mL/s, all managed through a sleek touch interface with Wendougee E-bar App. This means you can recreate the exact pressure curves of professional machines. It even includes dual pumps and a built-in Bluetooth to link to BooKoo scale and with other brands soon for real-time shot weight tracking and brew by weight feature. The Lita uses a 316L stainless saturated group head and dual boilers system with the LITA LA offing access to hot water through hot water tab from the group head. You get the best of both worlds – rock-solid temperature stability and steam power alongside versatile pressure and flow profiling, all in one compact machine. With its all-metal build and commercial-grade components, the Lita is designed for reliability and easy maintenance. It’s often compared to the Decent DE1 XL, but at a lower cost and with a more classic build – truly one of the best bang-for-the-buck options for serious home baristas as It is positioned to give you serious programmable control in a small, classic dual-boiler body.

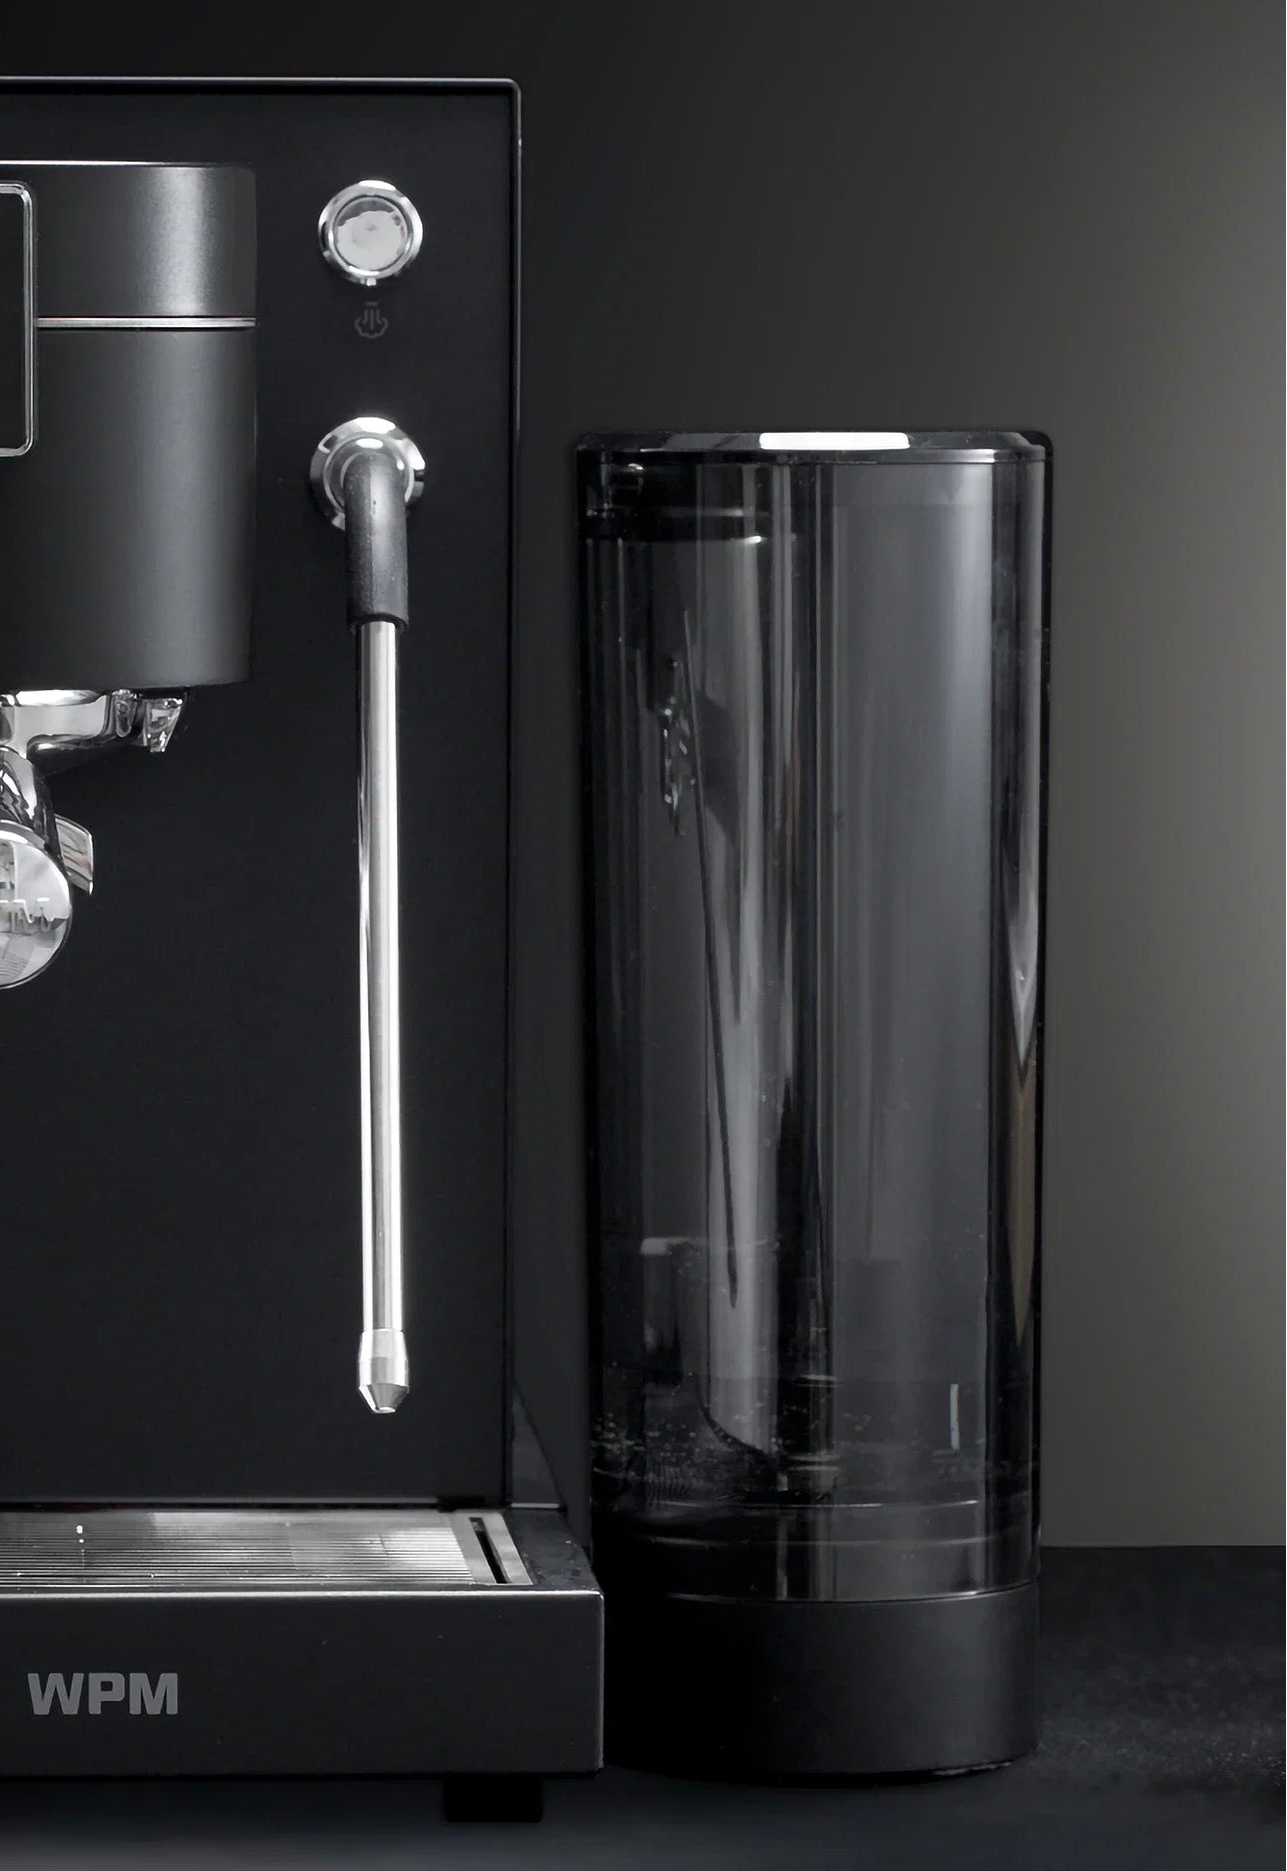
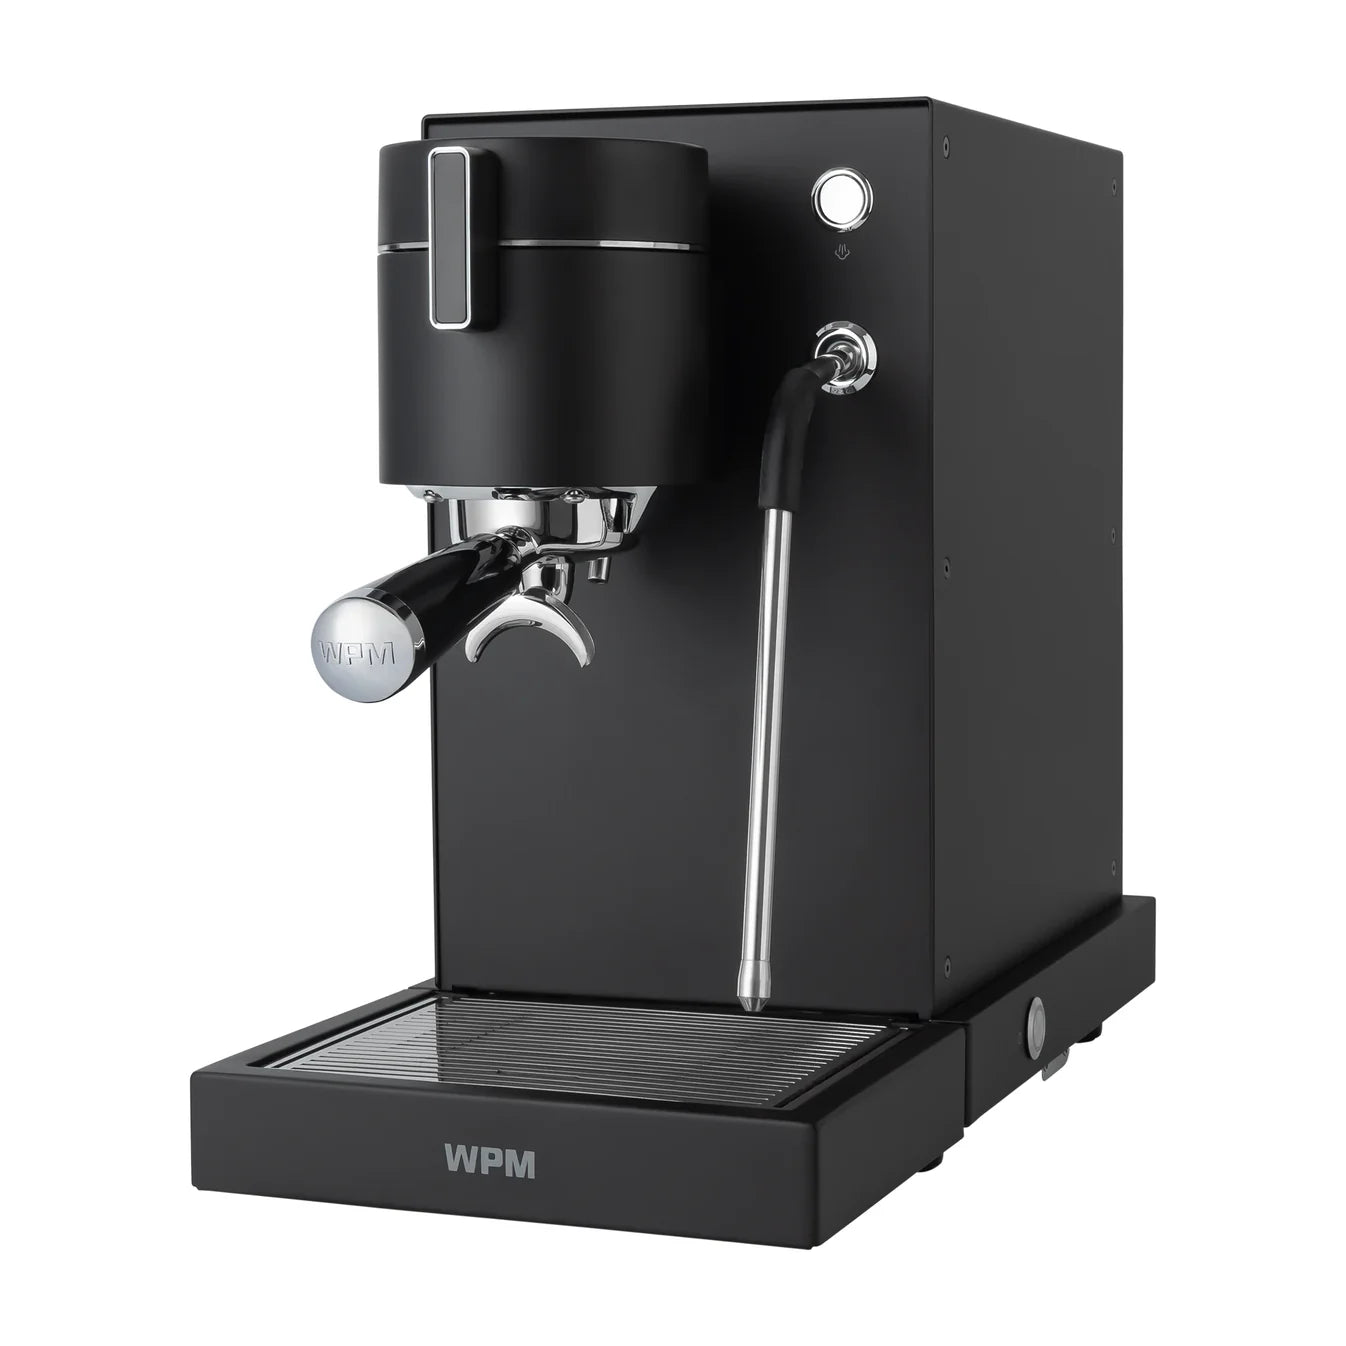
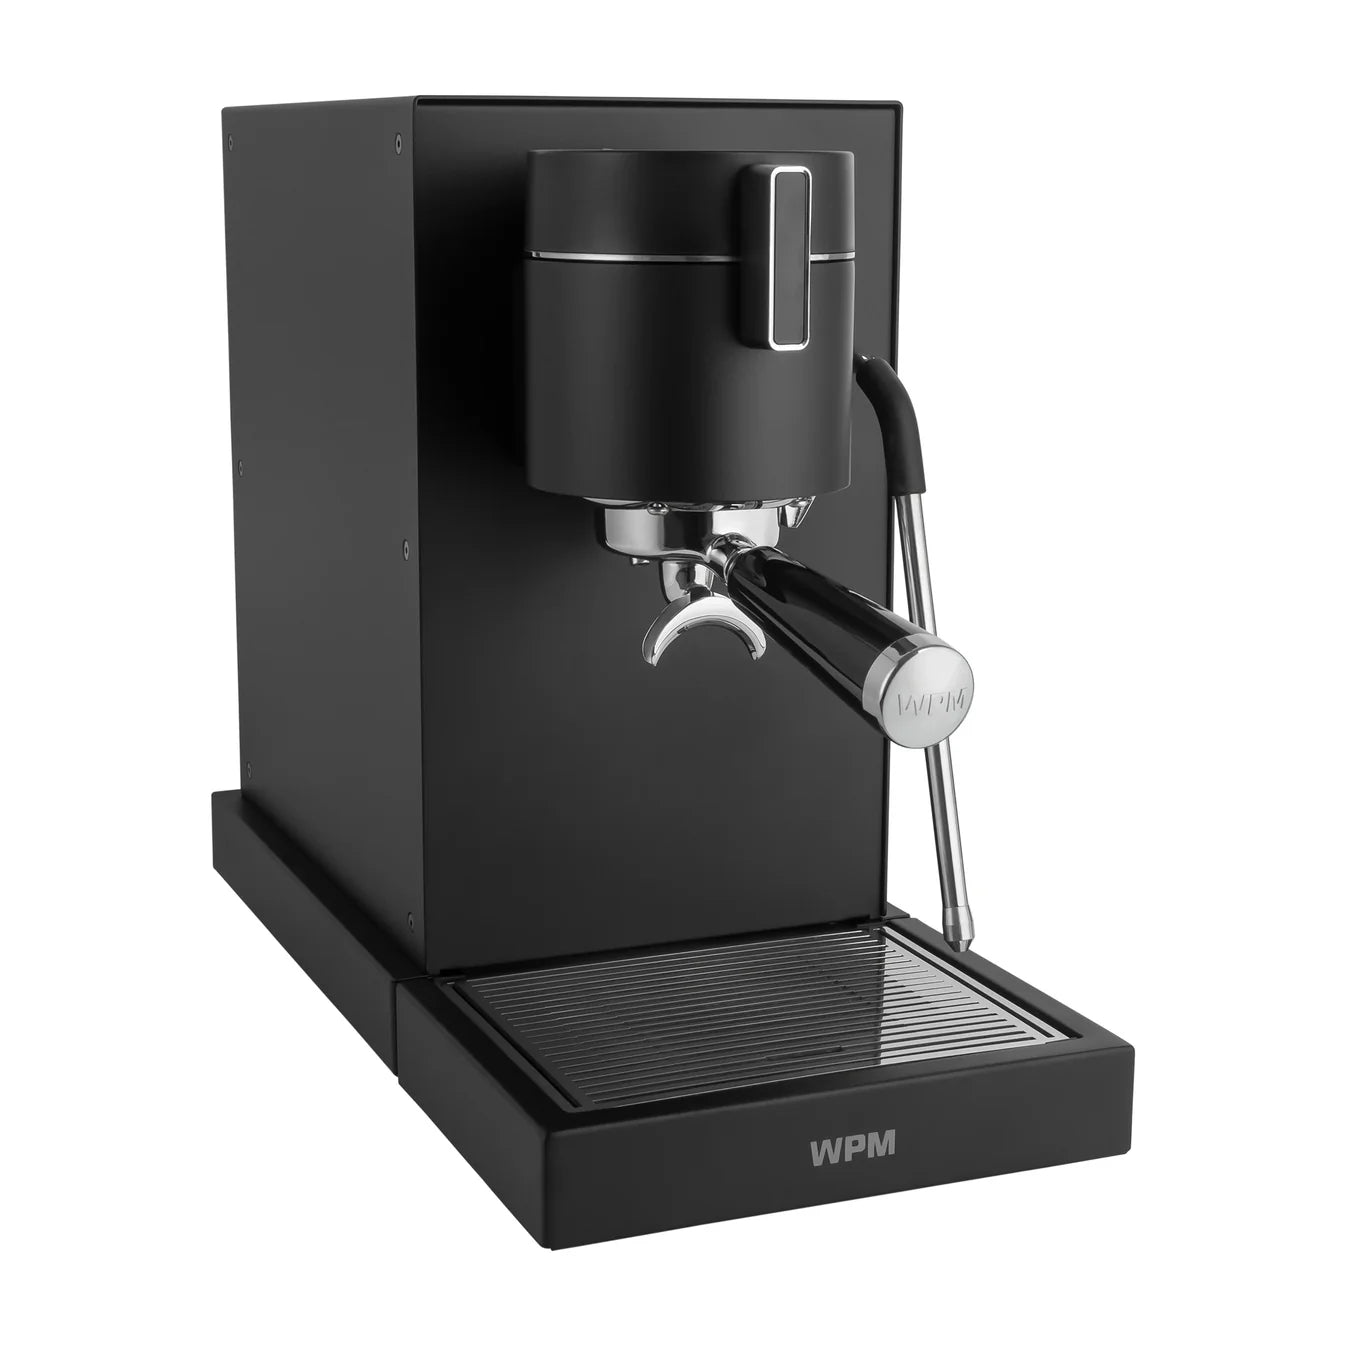
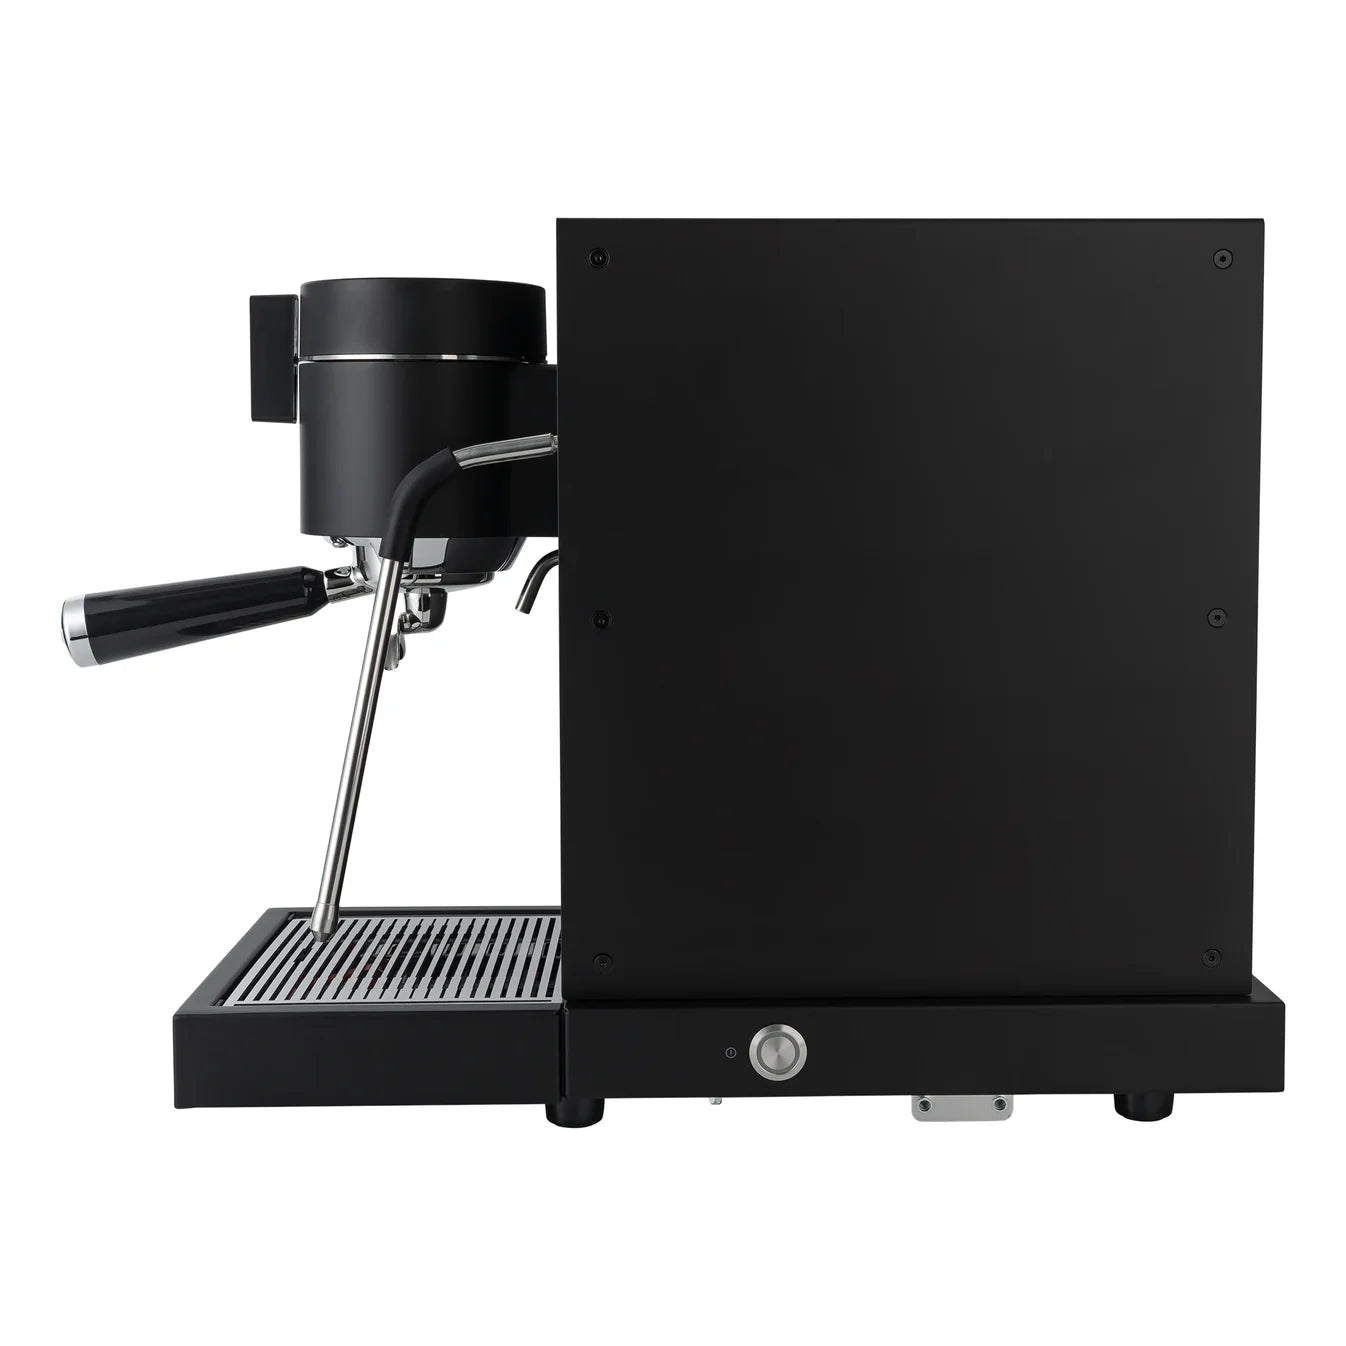
WPM Primus
The Primus is the most affordable way into true gear-pump profiling that we carry. The gear pump gives you real-time pressure profiling from 1 to 12 bar in 0.1-bar steps, in either pressure or flow mode, with three brewing modes (manual paddle, semi-auto, fully auto) and room for up to 20 saved profiles. It ships with preloaded profiles including a traditional Italian shot, a ramped third-wave profile, and a lever-style declining-pressure curve, so you can hear what each philosophy sounds like before building your own. A triple hybrid heating system (boiler plus brew thermoblock plus a dedicated steam thermoblock) means it brews and steams at once with great temperature stability and heats up in roughly 3 to 5 minutes, with a circular touchscreen on the group showing live pressure, flow, temperature, and time.

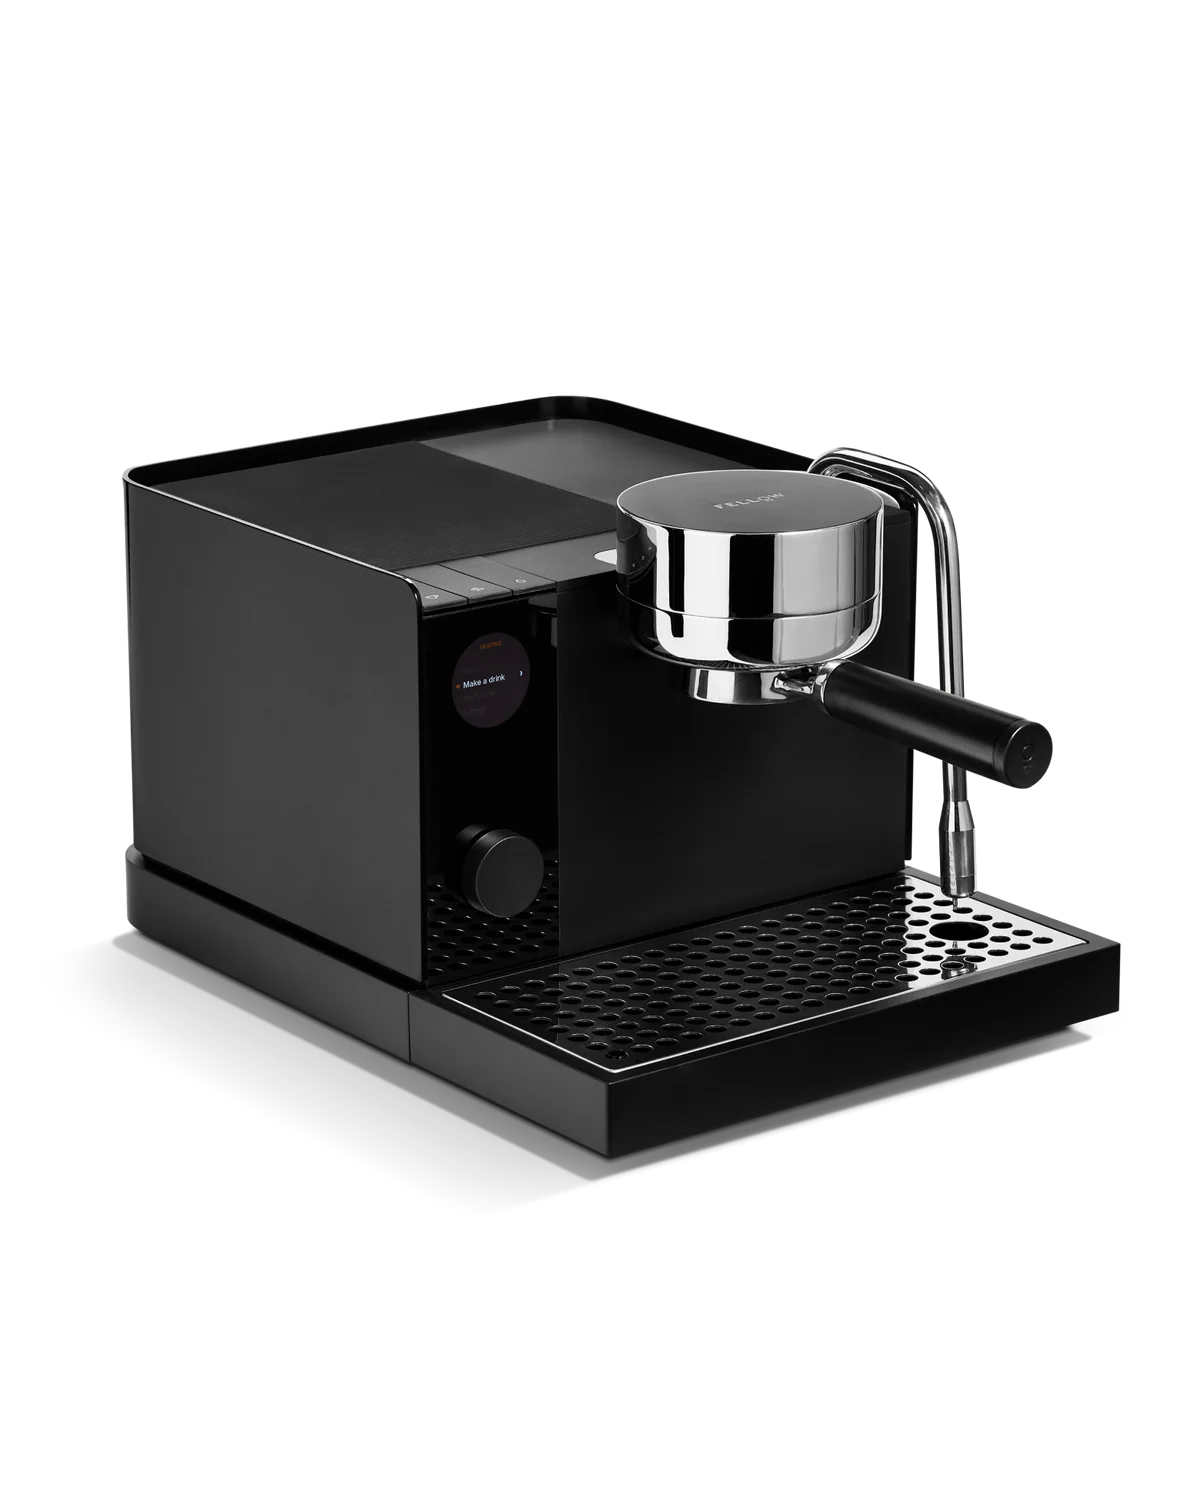
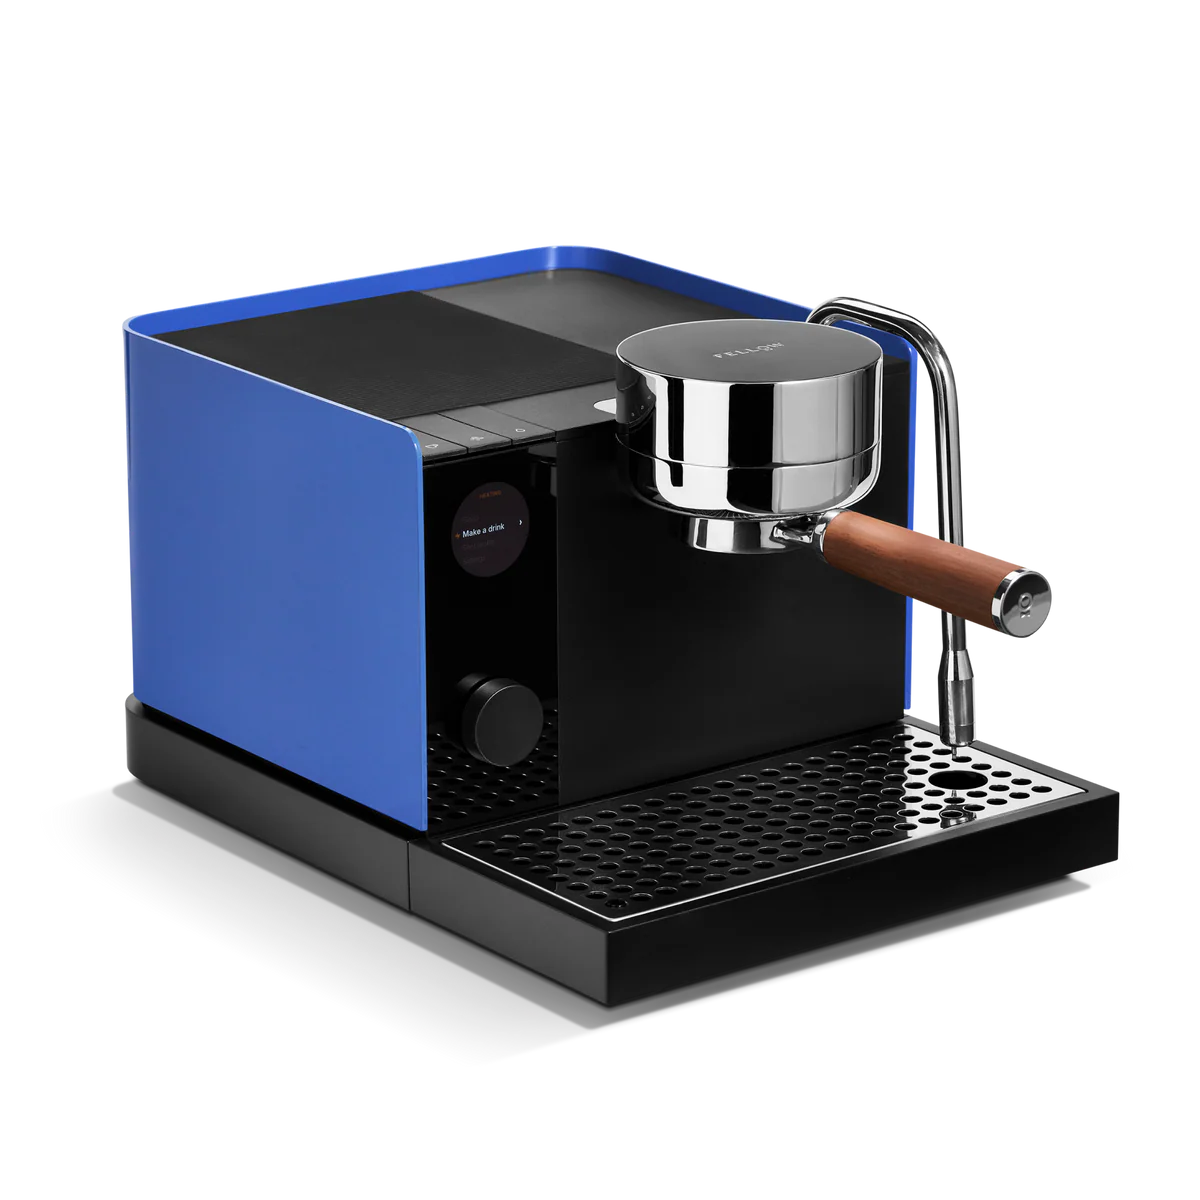
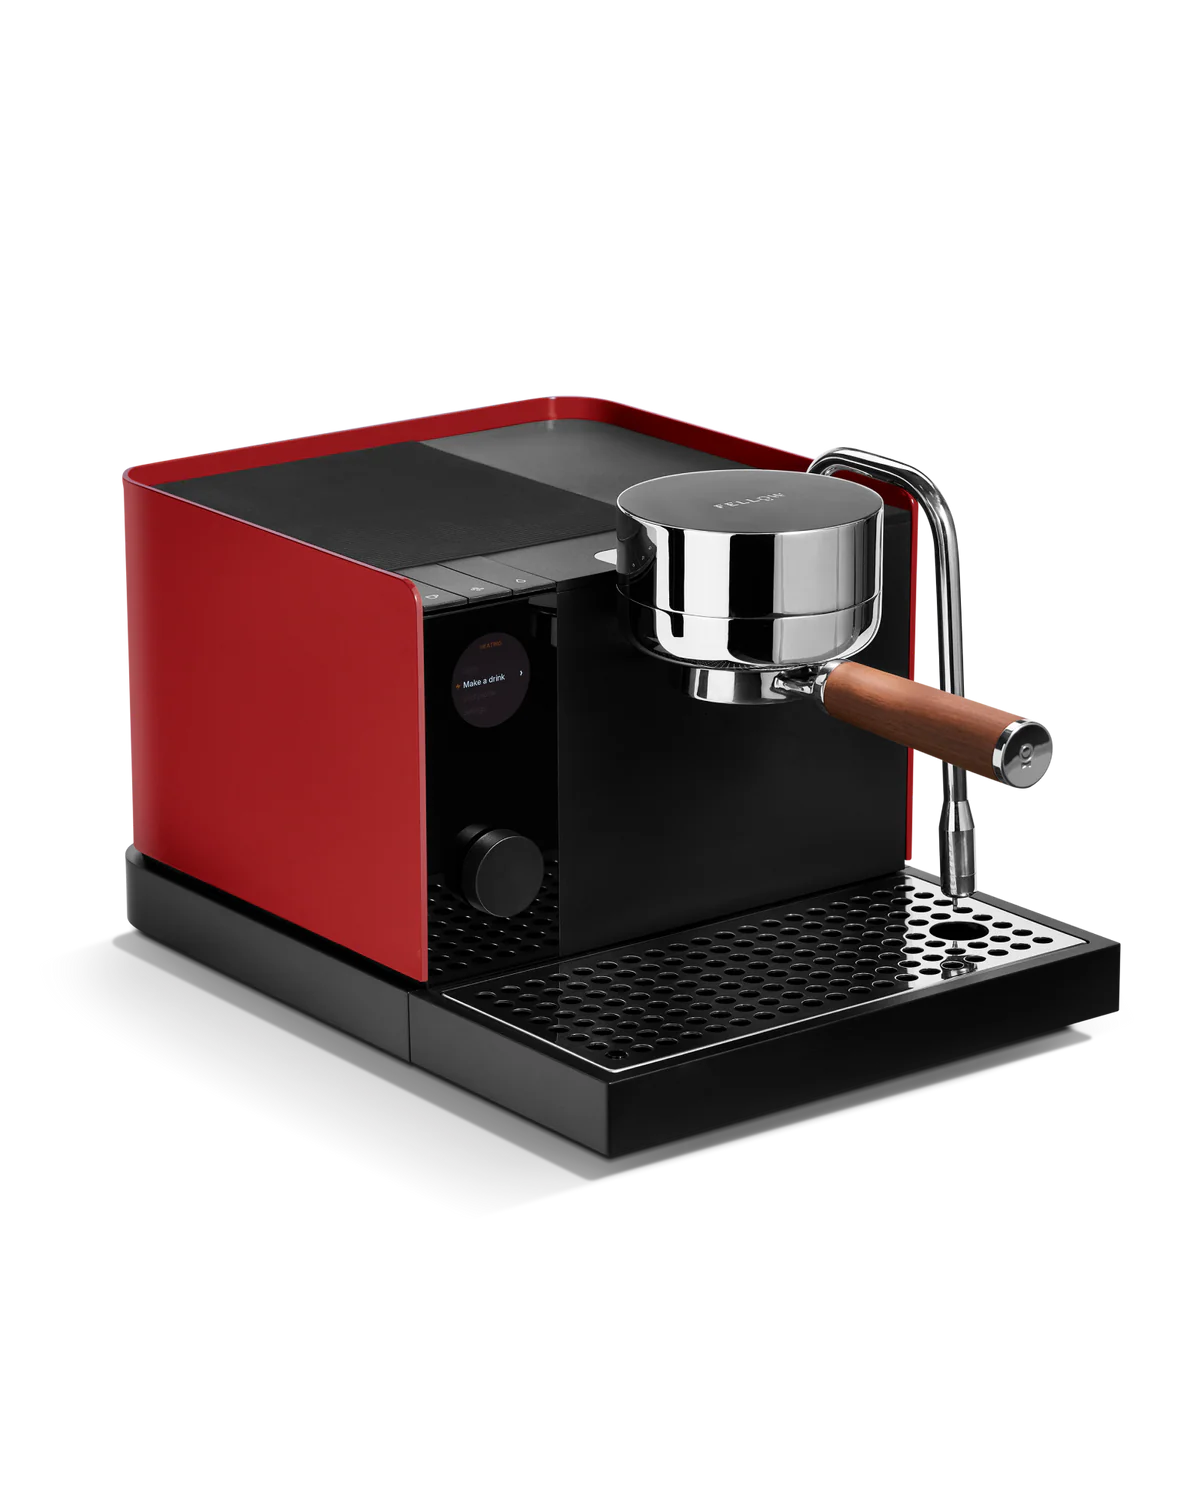
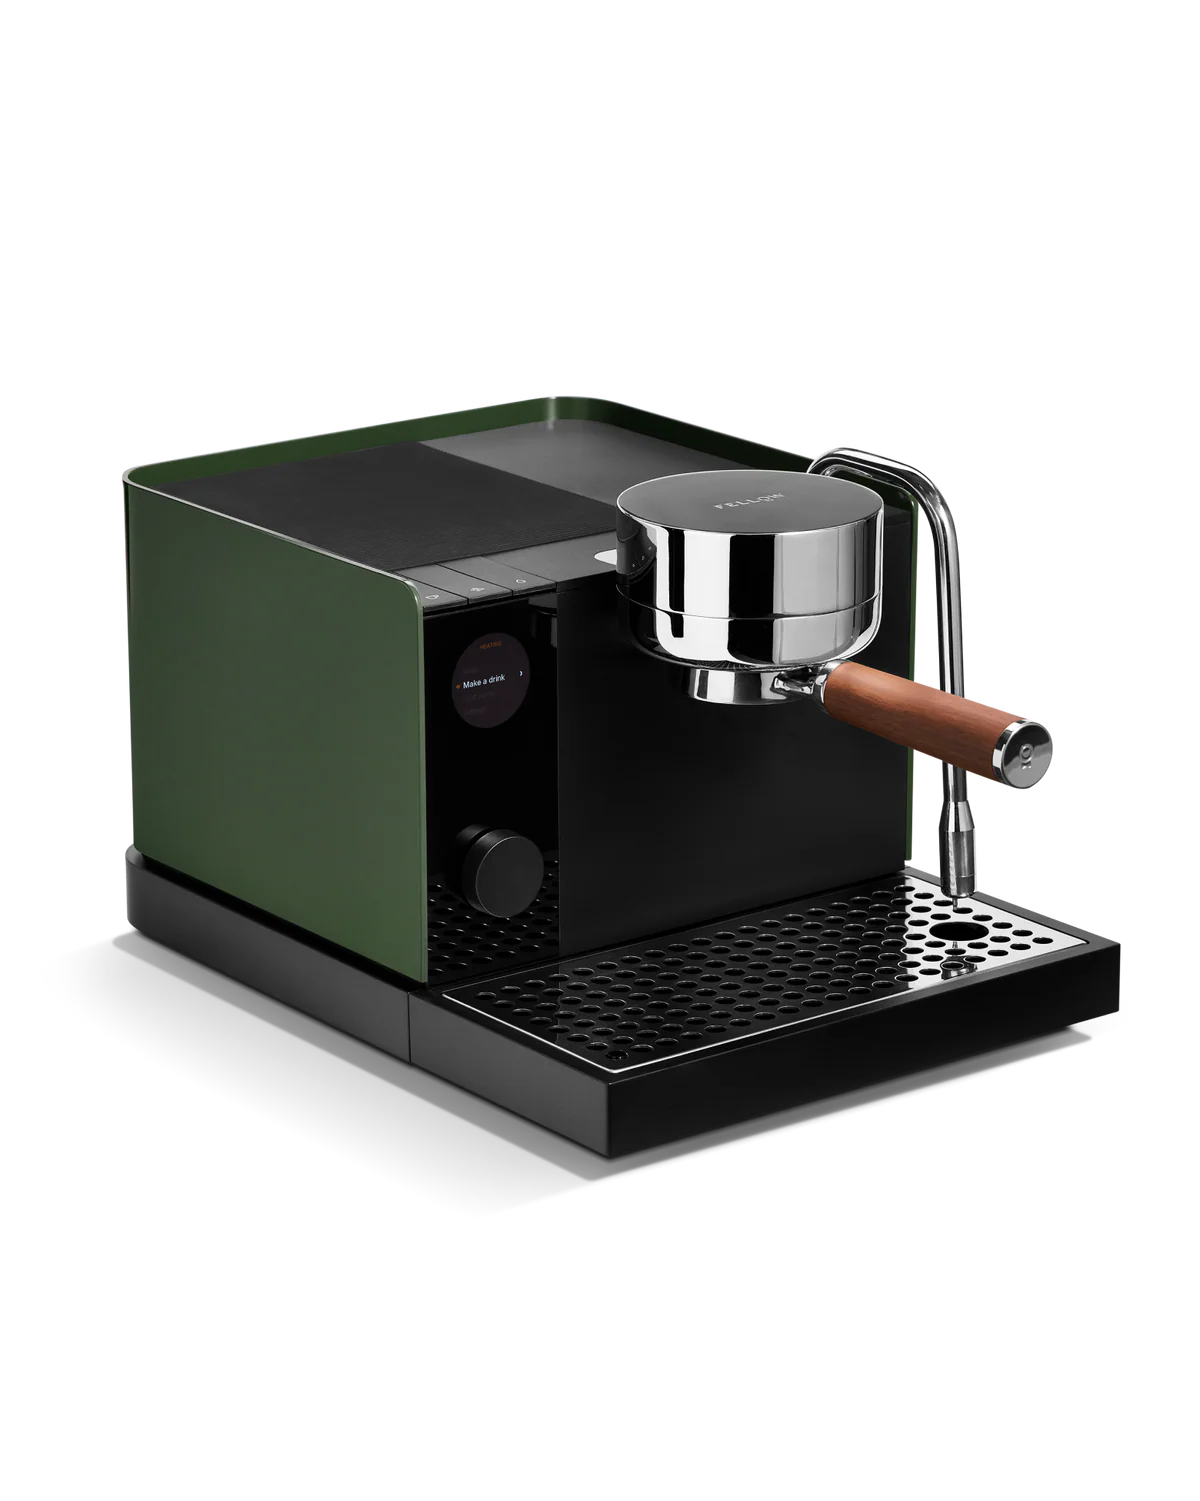
Fellow Espresso Series 1 (coming soon)
The Series 1 is not released yet in EU, so treat these specs as preliminary. Fellow's design uses a patented Boosted Boiler with an independently heated grouphead to get dual-boiler-like behaviour with a very fast warm-up, and offers programmable pressure profiling across three phases (pre-infusion, infusion, ramp-down) up to 9 bar. Preloaded profiles include a classic 9-bar shot, a declining lever-style profile, and a turbo shot, plus app-based custom profiles and shot feedback that suggests grind changes. It is the most beginner-friendly profiler in the lineup, aimed at people who want guided control rather than a blank canvas.


Lelit Bianca V3
Manual Flow Control Marvel. The Bianca has become a modern classic for enthusiasts. It’s a dual-boiler machine with an E61 group, distinguished by its wooden-accented paddle on top of the group head that lets you manually control the flow rate during the shot. By rotating the paddle, you adjust a needle valve that can reduce the flow from the pump – effectively letting you mimic pressure profiling by feel. With the paddle fully open, the Bianca delivers about 6–7 ml/s flow (roughly 9 bar on a properly packed puck). You can also pre-set a low-flow pre-infusion mode on the Bianca V3 for even more control. While it doesn’t have fancy electronics or profiles at the touch of a button, the tactile and analog nature of the Bianca appeals to those who like a hands-on approach. It’s also relatively affordable for the feature set and built to high standards (polished steel body, walnut trims, PID control, etc.). Many home baristas have used the Bianca to experiment with techniques like blooming shots or declining pressure shots – it’s a very flexible machine that rewards practice with fantastic espresso. (And if you ever don’t feel like profiling, you can always set the paddle to a “standard” position and use it like a regular 9-bar machine.)

Rocket Espresso R Nine One
Cafe Tech for Home. Rocket’s R Nine One is a high-end one-group machine that brings commercial machine pedigree into the home. It offers programmable pressure profiling with a built-in system (no paddle; instead you program profiles via its controller, or use a manual control knob during the shot on earlier versions). The R Nine One has a saturated group head and dual boilers, ensuring temperature stability akin to La Marzocco machines, and its pressure profiling system allows up to five stages of pressure to be set in a single shot. In terms of build and looks, Rocket machines are known for their meticulous stainless steel design and reliability. The R Nine One is often praised for giving very repeatable results – you can dial in a pressure curve that works and expect the machine to nail it shot after shot. This machine sits at the higher end of the price spectrum, but it’s an example of how far home machines have come: a decade ago, you’d only find this level of pressure control on multi-group commercial machines or rare $10k+ devices. Now it sits in a fairly normal kitchen!

La Marzocco GS3 (MP)
Benchmark Dual Boiler with a Paddle. La Marzocco’s GS3 is considered a gold standard in the prosumer category. The MP (manual paddle) version specifically gives the user direct control over pressure profiling. The paddle isn’t a flow paddle like the Bianca, but rather a valve that directly governs pressure in a saturated group (with the help of a needle valve and a bypass). It allows you to perform line-pressure pre-infusion and then ramp up or ramp down pressure manually. The GS3 has an extremely stable temperature profile thanks to its dual boiler + saturated group design (inspired by LM’s commercial Linea series). It’s built like a tank and carries the prestige of the La Marzocco brand. Many experienced baristas love the “feel” of the paddle and the ability to pressure profile in a very analog way on the GS3 MP. Of course, with that comes a high price tag. For those who want a more automated approach, La Marzocco also offers the Linea Mini (which now has a smartphone app to control pre-infusion somewhat, although it’s not a full profiling machine) and the GS3 AV which is more automated (but lacks the profiling paddle). Still, the GS3 MP remains a dream machine for many, effectively bringing a commercial lever-like control to home in a modern form.

Synesso ES1

Decent Espresso DE1
Advanced Pressure Profiling: Ramping, Declining, and Everything in Between
Once the puck is fully saturated and your shot is underway, pressure profiling really comes into play. Pressure profiling means actively modulating the pressure (or equivalently, the flow rate) during different stages of the shot instead of locking it at a flat value. There are many approaches and philosophies on how to profile a shot, and the “best” profile can depend on the coffee bean, roast level, grinder, and personal taste. Let’s explore a few concepts and techniques:
-
Lever-Style Declining Pressure: As discussed, one proven approach is the lever-style profile: start at high pressure and let it gradually decline. This often translates to something like a quick ramp-up to ~8–10 bar during the first few seconds of extraction, then a gentle taper down to ~6 bar by the end. The high pressure upfront helps fully extract oils and crema compounds, and the declining tail end prevents over-extraction of bitter components. Many modern machines emulate this by allowing you to program or manually perform a pressure reduction towards the end of the shot. If you’ve ever had a shot from a manual lever machine, you might notice a syrupy body and mellow finish – that’s the effect of declining pressure done naturally.
-
“Flat” Pressure vs. Flat Flow: Some baristas experiment with profiles that hold flow constant instead of pressure. For instance, a technique popularized by coffee guru Scott Rao for longer allongé shots is to set a flat flow rate (say 4 grams/second) for the entire shot, yielding a longer espresso (often a 1:4 or 1:5 ratio) over ~40 seconds. In this scenario, pressure is not held constant – it will spike at the start (perhaps reaching anywhere from 6 to 9 bar depending on the grind) then drop as the puck saturates and extracts. This flat-flow profile can highlight clarity and sweetness, essentially brewing a hybrid between espresso and strong filter coffee. It’s important to note that the exact pressure curve you get from a flat flow can vary greatly with different coffees and grinders.
-
Adapting to the Grinder and Roast: One fascinating insight from advanced users is how different grinders or roast levels affect pressure behavior. For example, consider two shots pulled with the same flow profile (e.g., the Rao allongé 4 g/s) but using different grinders:
-
Grinder A produces more fines (very small coffee particles), which create extra resistance in the puck. This shot might reach a peak pressure a bit lower (maybe it maxes at 7–8 bar because the grind isn’t ultra fine overall), but the pressure stays higher for longer as the fines continue to choke the flow slightly. The declining pressure curve is more gradual. The cup might come out with heavy body and possibly some extra bitterness or astringency, because those fines can lead to over-extraction of some components.
-
Grinder B (say a high-end burr set that produces a unimodal particle distribution with fewer fines) might require a much finer grind setting to hit a similar flow time, leading to an initial higher peak pressure (~9+ bar). However, since there are fewer fines to maintain resistance, the pressure could then drop off more quickly (maybe down to ~5 bar mid-shot). This can yield a very clean and bright cup, with lots of clarity, but possibly a bit lighter body or even a slightly under-extracted finish if the pressure (and thus extraction force) falls off too early.
In a real-world example, a shot pulled on a set of large conical burrs (which tend to produce more fines) showed a modest peak pressure and a sustained ~6 bar through most of the shot, whereas the same coffee on an EK43 with SSP burrs (very few fines) spiked to 9 bar then quickly dropped to ~5 bar. Tasting these, the first had huge mouthfeel and intensity but also a rougher finish, while the second was more delicate and sweet but somewhat thin. Neither profile was “wrong” – they just highlighted different aspects of the coffee. The takeaway for an advanced barista is that there is no one-size-fits-all pressure profile. Small changes in variables (grind, dose, coffee age, roast) can mean a profile that tastes great in one case might need adjustment in another. This is why understanding the principles (rather than blindly following a recipe) is so important.
-
-
On-the-Fly Adjustments: Another benefit of having control over pressure/flow is the ability to rescue a shot that’s going wrong. Suppose you start a shot and notice the pressure barely rises to 4–5 bar (meaning the flow is too fast, likely an underdosed or too-coarse puck). Instead of just letting it gush into an under-extracted espresso, a barista with flow control could immediately crank down the flow rate, essentially “choking” the shot to slow it down. You might end up running the shot longer than normal, but by reducing flow you can potentially eke out a decent extraction and save the cup. Conversely, if a shot is choking (pressure hits 9 bar and stays there too long, drip… drip… with very slow flow), a skilled barista might pause the shot (for a bloom) or gently lift a lever or open a valve to reduce pressure, allowing the puck to dissolve a bit before continuing, or even terminate early to avoid an overly bitter brew. These kinds of real-time profiling decisions are what professional baristas do in high-end cafes with manual levers or programmable machines – and now they’re increasingly accessible to home enthusiasts with the right equipment.
Key Benefits of Pressure/Flow Profiling:
-
More Even Extraction: By tailoring pressure to the coffee’s resistance, you avoid blasting channels through the puck. This can reduce bitter or astringent elements and produce a more balanced flavor.
-
Optimized Flavor for Each Coffee: Light roasts, for instance, often benefit from a gentler pressure profile (e.g., longer pre-infusion and lower peak pressure) to tease out sweetness without harshness, while a dark roast might benefit from a shorter, higher-pressure shot to avoid overextracting smoky bitter notes. Profiling lets you bring out the best in each bean.
-
Control Over Body and Clarity: Pressure and flow affect extraction yield and which compounds dominate. Want a thicker, more syrupy shot? A profile with a strong high-pressure phase can emphasize body. Craving a clean, tea-like espresso with distinct origin flavors? A lower pressure or declining profile may achieve that.
-
Consistency Once Dialed-In: With programmable machines, once you discover a profile that works for a particular coffee, you can repeat it exactly. This reduces shot-to-shot variation compared to manual operation, especially when combined with tools like integrated scales or apps that some machines offer.
-
Enhanced Learning and Engagement: Perhaps the greatest benefit for the enthusiast is the window into extraction that profiling provides. Watching how your pressure and flow changes with different grinds or doses, and tasting the results, will rapidly improve your understanding of espresso. It’s a hands-on education in coffee science that makes the hobby even more rewarding.
How to do pressure profiling and make your coffee better
The order of operations matters more than any single profile. Here is the sequence the science and the practitioners agree on.
-
Read the cup and adjust one thing.Bitter usually means you held high pressure too long, so soften the peak or shorten it; sour usually means under-extraction, so give it more pressure-time or grind finer; bitter and sour together means channeling, so go back to grind and puck prep before blaming the profile. Change one variable per shot and write down what you did.
Key Benefits of Pressure/Flow Profiling:More Even Extraction: By tailoring pressure to the coffee’s resistance, you avoid blasting channels through the puck. This can reduce bitter or astringent elements and produce a more balanced flavor.Optimized Flavor for Each Coffee: Light roasts, for instance, often benefit from a gentler pressure profile (e.g., longer pre-infusion and lower peak pressure) to tease out sweetness without harshness, while a dark roast might benefit from a shorter, higher-pressure shot to avoid overextracting smoky bitter notes. Profiling lets you bring out the best in each bean.Control Over Body and Clarity: Pressure and flow affect extraction yield and which compounds dominate. Want a thicker, more syrupy shot? A profile with a strong high-pressure phase can emphasize body. Craving a clean, tea-like espresso with distinct origin flavors? A lower pressure or declining profile may achieve that.Consistency Once Dialed-In: With programmable machines, once you discover a profile that works for a particular coffee, you can repeat it exactly. This reduces shot-to-shot variation compared to manual operation, especially when combined with tools like integrated scales or apps that some machines offer.Enhanced Learning and Engagement: Perhaps the greatest benefit for the enthusiast is the window into extraction that profiling provides. Watching how your pressure and flow changes with different grinds or doses, and tasting the results, will rapidly improve your understanding of espresso. It’s a hands-on education in coffee science that makes the hobby even more rewarding.Fix the fundamentals first.Before you touch a profile, lock in your brew ratio (a 1:2 is a safe starting point), then dial grind, dose, and distribution. TheFoodsstudy is blunt about this: ratio comes first, profiling second. A perfect profile on a badly distributed puck still tastes like a badly distributed puck.Prep the puck like it matters, because it does.Even distribution and a level tamp do more to prevent channeling than any curve you can program. A profile cannot rescue a puck with a crack or a clump in it.Pull with feedback.Use a bottomless (naked) portafilter so you can see how the shot flows, and watch your pressure gauge or flow readout. A shot that sprays sideways or "spurts" is usually channeling, though with very light roasts a little spurting can be harmless.
How to start pressure profiling your espresso
If you have got a profiling machine and want a concrete starting point, here are three profiles to copy. Pull them, taste them, then adjust.
The all-rounder (start here)
- Pre-infusion: 2 to 3 bar for about 6 to 12 seconds, until the first drops appear
- Extraction: ramp to a 6 to 9 bar peak
- Decline: taper to around 4 to 6 bar toward the end
- Ratio: 1:2
The light-roast profile (Hedrick-style)
- Pre-infusion: around 3 bar for 10 to 12 seconds to fully saturate the bed
- Infusion: spike to 8 to 9 bar for 10 to 12 seconds
- Taper: ease off as the puck erodes
- Ratio: around 1:2.5 to 1:3
The turbo shot (clean and bright)
- Grind coarser than usual
- Hold around 6 bar
- Fast pull, roughly 10 to 16 seconds
- Expect lower body, higher clarity
If your machine does flow rather than pressure, the equivalent all-rounder is a roughly flat 4 mL/s flow with a longer ratio (1:3 to 1:4) over 30 to 60 seconds, which is the basis of Scott Rao's allonge. One caution on the pause-after-pre-infusion trick: on some machines the three-way solenoid vents when the pump stops, which can crack or unseat the puck and cause instant channeling when you resume. Know your machine before you build a pause into the profile.
Start with the all-rounder, change one thing at a time, and trust your tongue over your gauge. The gauge tells you what you did. The cup tells you whether to do it again.
Frequently asked questions
Pressure Profiling & Flow Control Basics
What is pressure profiling in espresso?
Pressure profiling is varying the water pressure during a shot instead of holding a constant 9 bar. A typical profile uses low pressure to wet the puck, a higher peak to drive extraction, and a decline toward the end. It changes how evenly the coffee extracts and how the shot tastes.
What is flow profiling (flow control) in espresso?
Flow profiling means varying the water flow rate — how many millilitres or grams pass through the coffee each second — and letting pressure settle wherever it needs to. Instead of telling the machine "hold 9 bar," you tell it "deliver 4 mL per second." Our team often explains it like this: if pressure profiling is steering by the pressure gauge, flow profiling is steering by the flow meter. It's commonly done with a needle-valve paddle or in software with a pump that adjusts its own speed.
What's the difference between pressure profiling and flow control?
They control different variables in the same equation that governs every shot: pressure equals flow multiplied by puck resistance. Pressure profiling fixes the pressure and lets flow rise as the puck erodes; flow profiling fixes the flow and lets pressure fall. In our experience, flow control is the better tool for healing channels mid-shot, while pressure control is the more intuitive way to recreate the classic lever-style curve.
Are pressure profiling and flow control the same thing?
Not quite, but they're two sides of the same coin, which is why people use the terms loosely. Because pressure, flow, and puck resistance are mathematically linked, changing one always moves the others — restrict the flow and pressure drops, open it up and pressure climbs. For most home setups the two approaches overlap heavily; the distinction matters most when you want a specific behaviour, like fixing a channel as it forms.
How does pressure relate to flow in an espresso shot?
We like to anchor this in one relationship: pressure = flow × puck resistance. On a machine that holds pressure constant, the flow rate actually rises during the shot, because the puck loses mass and gets more porous as coffee dissolves out of it. To keep pushing the same 9 bar through a weakening puck, the machine sends more and more water through it — exactly when the bed is least able to handle it evenly. That late-shot acceleration is precisely what flow control was invented to stop.
Is 9 bar really the best pressure for espresso?
Not necessarily. The 9-bar standard isn't a law of physics — it's a historical accident. It emerged from Achille Gaggia's 1940s spring-lever piston design, where roughly 9 bar was simply the natural outcome of the mechanics of the era combined with human strength, and it was then locked in when Faema's 1961 E61 electric-pump machine set the pump to a constant 9 bar. Modern research has since found that dropping pressure to 6 bar can reduce clogging, widen the range of grind settings at which coffee tastes great, and produce higher, more consistent extraction with far less shot-to-shot variation. In our experience many modern shots, especially light roasts, taste better below 9 bar.
How Pressure Profiling & Flow Control Affect Your Espresso
How does pressure profiling affect taste and extraction?
By tailoring pressure to the coffee's resistance, you avoid blasting channels through the puck, which produces a more even, balanced extraction. Generally, higher pressure early can emphasise brightness and acidity, a strong mid-shot peak builds body and crema, and a declining tail reduces the late bitterness that creeps in at the end of a shot. The cup becomes something you can steer toward sweetness and clarity rather than leaving to chance.
How does flow control change the espresso shot?
Flow control lets you slow the water down when the puck is most fragile, which front-loads richness and prevents the over-push that causes uneven extraction. Slower flow gives a higher initial concentration and a heavier, sweeter cup; faster flow gives a lower, flatter, cleaner extraction. It also typically lengthens your shot — a flow-controlled or lower-pressure pull can run anywhere from 35 to 50 seconds instead of the traditional 20–30 — because time becomes a result of your profile rather than a fixed target.
Does flow control reduce channeling?
It can, in two ways. A gentle, ramped flow at the start saturates the bed evenly before full pressure hits, and holding flow steady later prevents the acceleration that tears channels open in a weakening puck. On a flow-profiling machine, when a channel starts to open the pressure drops to compensate, which reduces erosion through that channel and can even give it a chance to "heal" as the grounds rearrange.
How does pressure profiling affect sweetness, body, bitterness, and clarity?
In our experience, a declining pressure finish (easing down to roughly 4–6 bar) tends to preserve sweetness and clarity while cutting the bitterness and astringency that develop late in a shot. Higher pressure and slower flow push more dissolved solids and emulsified oils into the cup for a heavier, syrupy body; lower pressure and faster flow lean toward a cleaner, brighter, more tea-like cup. Neither is "correct" — they're simply different drinks, and profiling lets you choose.
Does profiling help with light roasts?
Yes — this is one of the biggest payoffs. Light roasts are dense, less soluble, and prone to falling apart and channeling under a hard 9-bar hit. A gentler approach — a longer pre-infusion and a lower peak around 6–8 bar — lets you extract them fully without blowing the puck apart, which is why we recommend profiling-capable machines to anyone chasing fruit-forward single origins.
Does pressure profiling or flow control increase extraction yield?
It can, but it's not guaranteed. Slowing the flow generally raises extraction yield because the water spends more time in contact with the coffee, and a controlled, even extraction lets you reach higher yields without the bitterness that channeling brings. That said, the larger, more reliable benefits we see are improved consistency and reduced waste rather than dramatic jumps in yield — your brew ratio and grind still do most of the heavy lifting.
Does profiling affect crema?
It does. A strong mid-shot pressure peak around 8–9 bar is where most of the crema-building happens, while very low-pressure "turbo"-style shots produce thinner, shorter-lived crema. If a thick, dense crema matters to you, keep a meaningful high-pressure phase in your profile; if you're chasing clarity over crema, a lower-pressure profile is the trade-off.
Why does my espresso taste bitter and sour at the same time?
That combination is the classic signature of channeling — water finding an uneven path through the puck, over-extracting some regions while under-extracting others. We always tell customers to fix this at the source first: improve grind consistency, distribution, and tamp before reaching for a profile. Profiling can reduce channeling, but it can't fully rescue a badly prepared puck.
Does water temperature matter as much as pressure and flow?
Within a normal espresso range, flow and pressure are the bigger levers. Controlled research has found that flow rate had the strongest effect on what ended up in the cup of the process parameters tested, while changing temperature alone showed little measurable effect on the compounds measured. Temperature still matters for dialling in specific flavours, but we'd encourage you to treat flow and pressure as the more powerful adjustments once your ratio and grind are set.
Pre-Infusion, Blooming & Profiles Explained
What is pre-infusion and how does it relate to profiling?
Pre-infusion is wetting the coffee puck at low pressure or flow before full extraction begins. It lets the grounds swell and settle into an even bed, which reduces channeling, and it's essentially the opening phase of any good pressure or flow profile. The one catch we flag: a too-slow trickle can leave the bottom of the puck dry, so it's often better to fill the headspace fairly quickly, then optionally pause for a true bloom.
What's the difference between pre-infusion and blooming?
They're closely related. Pre-infusion is the gentle low-pressure saturation phase; a "bloom" goes a step further by pausing the shot entirely after the puck is wet, letting it rest and release CO₂ before you resume. In espresso the bloom window is short and under pressure, unlike the 30–45 second bloom in pour-over, but the principle is the same: let water penetrate evenly before applying full force.
What is a declining pressure profile and what does it do?
A declining pressure profile starts at a higher pressure and tapers down toward the end of the shot — for example, peaking around 8–9 bar then easing to 6 bar or lower. This mimics what a spring-lever machine does naturally. The high pressure up front drives extraction and crema, while the declining tail keeps contact time up as the puck weakens, which tends to reduce bitterness and astringency and preserve sweetness in the final seconds.
What is a pressure profile or flow profile?
It's simply the curve you program or perform across the shot — the shape of pressure (or flow) plotted against time. A common, well-proven shape is a low-pressure pre-infusion, a ramp up to a peak, then a decline. On flow-based machines the equivalent is a low starting flow that ramps up and then holds or tapers. Once you find a profile that works for a coffee, you can repeat it shot after shot.
What does a good starting profile look like?
We recommend an "all-rounder" to start: pre-infusion at 2–3 bar for about 6–12 seconds until the first drops appear, a ramp to a 6–9 bar peak, then a taper to roughly 4–6 bar at the end, all at a 1:2 ratio. Pull it, taste it, and change only one variable at a time. For light roasts, try a longer pre-infusion and a lower peak around 6–8 bar.
What is a turbo shot?
A turbo shot is a fast, low-pressure espresso: a coarser grind, around 6 bar, pulled in roughly 10–16 seconds, often at a slightly longer ratio. Because the coarser grind and lower pressure promote even water flow, turbo shots can reach high extraction yields with less channeling, producing a sweeter, brighter, cleaner cup — at the cost of a lighter body. They're a great showcase for what flow and pressure control let you experiment with.
Using Pressure Profiling & Flow Control in Practice
How do I use flow control on my machine?
Start with the paddle (or valve) about halfway, begin the shot, and let pressure rise gently to around 2–3 bar to pre-infuse. Once the bed is saturated, open the flow up toward full to reach your peak pressure for the main extraction, then ease it back down near the end to taper off. Watch your group pressure gauge or flow readout for live feedback, and use a bottomless portafilter so you can see channeling if it happens.
How do I pressure profile on my machine?
The workflow depends on your machine, but the order of operations is always the same: lock in your brew ratio, grind, dose, and puck prep first, then layer a profile on top. Begin with a low-pressure pre-infusion, ramp to your peak, and decline at the end. Change one thing per shot, write it down, and trust your tongue over the gauge — the gauge tells you what you did, the cup tells you whether to do it again.
Do I need a flow control device for an E61 machine?
If you have an E61 group and want to profile, a flow-control kit is the cheapest entry point. It adds a needle-valve paddle to the group that lets you manually restrict or open the water flow in real time, which indirectly shapes pressure. It's worth knowing that on a mechanical E61 setup pressure will still build toward 9 bar if you hold the paddle open — the device gives you control over the ramp and the pre-infusion, not a fully programmed pressure curve.
How does flow control work on a manual lever vs. a paddle vs. an app?
On a manual lever machine, you are the pump — your physical effort on the lever sets the pressure, and a spring lever delivers a naturally declining curve. A paddle (mechanical flow control) opens and closes a needle valve so you steer flow by hand while watching a gauge. An app- or software-driven machine programs the pump itself to trace a saved pressure or flow curve automatically and repeatably. Levers and paddles are tactile and hands-on; software control is the most precise and repeatable.
What's a good way to do a slow ramp-up or a declining profile?
For a slow ramp-up, begin with a restricted flow or low pressure for the first 10–15 seconds so the bed saturates evenly, then gradually open up to your peak. For a declining finish, once you're past the peak, slowly reduce pressure or flow over the final third of the shot. A slow ramp-up also lets you grind finer than usual because it eases the puck into pressure, and the declining tail keeps the last grams of water in contact longer.
Can I pause the shot for a bloom and is it risky?
You can, but know your machine first. On some machines the three-way solenoid vents when the pump stops, which releases pressure and can crack or unseat the puck — causing instant channeling when you resume. Machines designed to hold the puck under pressure during a pause (or that let you program a true bloom step) handle this safely. If yours vents, a long pump-off pause can ruin the shot rather than help it.
Choosing a Machine with Pressure Profiling & Flow Control
Do I actually need pressure profiling at home?
Honestly, you don't need it — but it's a genuinely rewarding tool if you enjoy dialling in coffee and chasing the best from light roasts and single origins. We're upfront with our customers: your beans, grinder, ratio, and puck prep determine most of the cup before profiling enters the picture. Get those fundamentals right first, and profiling becomes the fine-tuning that takes a good shot to a great one rather than a magic fix.
Is flow control worth it?
For the right person, yes. Flow control shines for light roasts, single origins, channeling control, and anyone who enjoys tinkering and learning. It won't automatically improve your espresso, and it can actually make shots worse if your fundamentals aren't solid. If you're still mastering grind, dose, and ratio, we'd suggest getting comfortable there first then flow control becomes a powerful next step.
What espresso machine should I buy for pressure profiling and flow control?
At Vellutto we carry machines we'd put at the top of the list, at different price points. The WPM PRIMUS is the most affordable way into true gear-pump profiling we sell. The Wendougee LITA BA is a compact dual-boiler with twin vibratory pumps and on-machine profiling control. And the Wendougee DATA S is the flagship, a commercial-grade gear-pump machine with app-driven pressure and flow profiling. All three let you do both pressure and flow profiling.
What is the cheapest machine with flow control?
The cheapest true entry into pressure-and-flow profiling we carry is the WPM PRIMUS, which brings a gear pump and real-time profiling at a price point that used to require spending far more. If you simply want manual flow control and already own an E61 machine, adding an aftermarket E61 flow-control kit is cheaper still, but for a purpose-built profiling machine, the WPM PRIMUS is our value pick.
Tell me about the WPM PRIMUS for profiling.
The WPM PRIMUS is built around a quiet gear pump that gives real-time pressure profiling from 1 to 12 bar in 0.1-bar steps, in either pressure or flow mode. It offers three brewing modes — full manual via a tactile paddle, semi-auto with preset pressure stages, and fully automatic — and room for up to 20 saved profiles. A triple hybrid heating system lets it brew and steam at once and heat up in just a few minutes, and a circular touchscreen on the group shows live pressure, flow, temperature, and time. A firmware update has added a water-flow-limit feature for finer flow control. It's a strong fit for enthusiasts who want gear-pump control without a flagship price.
Tell me about the Wendougee LITA BA for profiling.
The Wendougee LITA BA is a compact dual-boiler machine that runs twin silent vibratory pumps under software control, giving you both pressure-priority and flow-priority profiling (one mode per profile step). Its standout feature is the on-machine Intelligent Disc — a capacitive touch controller above the group that lets you scroll, launch, and run saved profiles and read live pressure, flow, and shot time without a phone. You set up profiles once using the free E-Bar app, then the machine runs standalone. It uses dual 316L stainless boilers and a saturated group head, and can connect to a Bluetooth scale for brew-by-weight.
Tell me about the Wendougee DATA S for profiling.
The Wendougee DATA S is our flagship profiler. It uses a commercial-grade gear pump that adjusts its speed continuously to follow a programmed pressure or flow curve, with headroom above the usual 9 bar. You design and save profiles in the Wendougee E-Bar app, which shows live pressure, flow, and temperature graphs, and launch them with a physical paddle. It pairs dual 316L stainless boilers — a larger steam boiler plus a saturated brew group — for excellent temperature stability and strong steam, with German WIKA pressure sensing and an Italian GICAR flow meter. It's an end-game machine for the enthusiast who wants no compromise.
Which is better for me — the WPM PRIMUS, LITA BA, or DATA S?
It comes down to how you want to control profiles and how much steam and stability you need. Choose the WPM PRIMUS if you want true gear-pump profiling at the most accessible price with on-group touchscreen control. Choose the LITA BA if you want a compact dual-boiler you can run entirely from the machine itself via the Intelligent Disc, no phone in hand. Choose the DATA S if you want the flagship gear pump, the biggest steam performance, app-based profile design, and the most headroom and build quality. We're always happy to talk it through with you directly.
Which machines offer both pressure and flow profiling?
All three machines we recommend — the WPM PRIMUS, Wendougee LITA BA, and Wendougee DATA S — let you profile by pressure or by flow. On the Wendougee machines you choose pressure-priority or flow-priority for each profile (one mode at a time per step), and on the PRIMUS you switch between pressure and flow modes as well. Gear-pump and twin-pump designs like these are what make true software flow profiling possible, rather than the manual, indirect flow control of a paddle-only E61 setup.
Is profiling worth it for a home barista, and are there beginner-friendly options?
For a curious home barista who's mastered the basics, profiling is absolutely worth it — it's a hands-on education in extraction as much as a flavour tool. For beginners, we'd point you to machines that grow with you: the WPM PRIMUS has one-touch auto and semi-auto modes you can use like a basic machine, then graduate into full manual control, and the Wendougee LITA BA loads preset profiles you can launch from the Intelligent Disc without building anything yourself. Start simple, then expand as your palate and curiosity develop.
Manual vs. automated profiling — which should I choose?
Manual profiling (a lever or a paddle) is tactile, immediate, and lets you react to the shot in real time, but it varies more shot to shot and has a steeper learning curve. Automated profiling (software- or app-driven, like the Wendougee machines or the PRIMUS) gives you repeatability — once you find a great profile, the machine nails it every time — and live data to learn from. If you love the ritual and feel, go manual; if you value consistency and want to change one variable at a time, go automated.
Flow control paddle vs. app control — what's the difference?
A flow-control paddle is a mechanical needle valve you turn by hand while watching a gauge; it's intuitive and satisfying but manual, so repeatability depends on your technique. App (or on-machine software) control lets you design a precise curve, save it, and have the pump execute it identically every time, with live graphs to review. The Wendougee DATA S uses the E-Bar app for profile design, the LITA BA adds on-machine Intelligent Disc control so you don't need a phone day to day, and the WPM PRIMUS combines a paddle with a programmable touchscreen.


Share:
Latte Art - How to Steam Milk with Microfoam for for beginners
Fellow Series 1 vs WPM Primus: Which Espresso Machine Should You Buy?